Install On cPanel Shared Hosting
To install on cPanel shared hosting, access cPanel, and follow the installation prompts for seamless setup.
Recommended tutorial is below 👇
Follow This Instructions
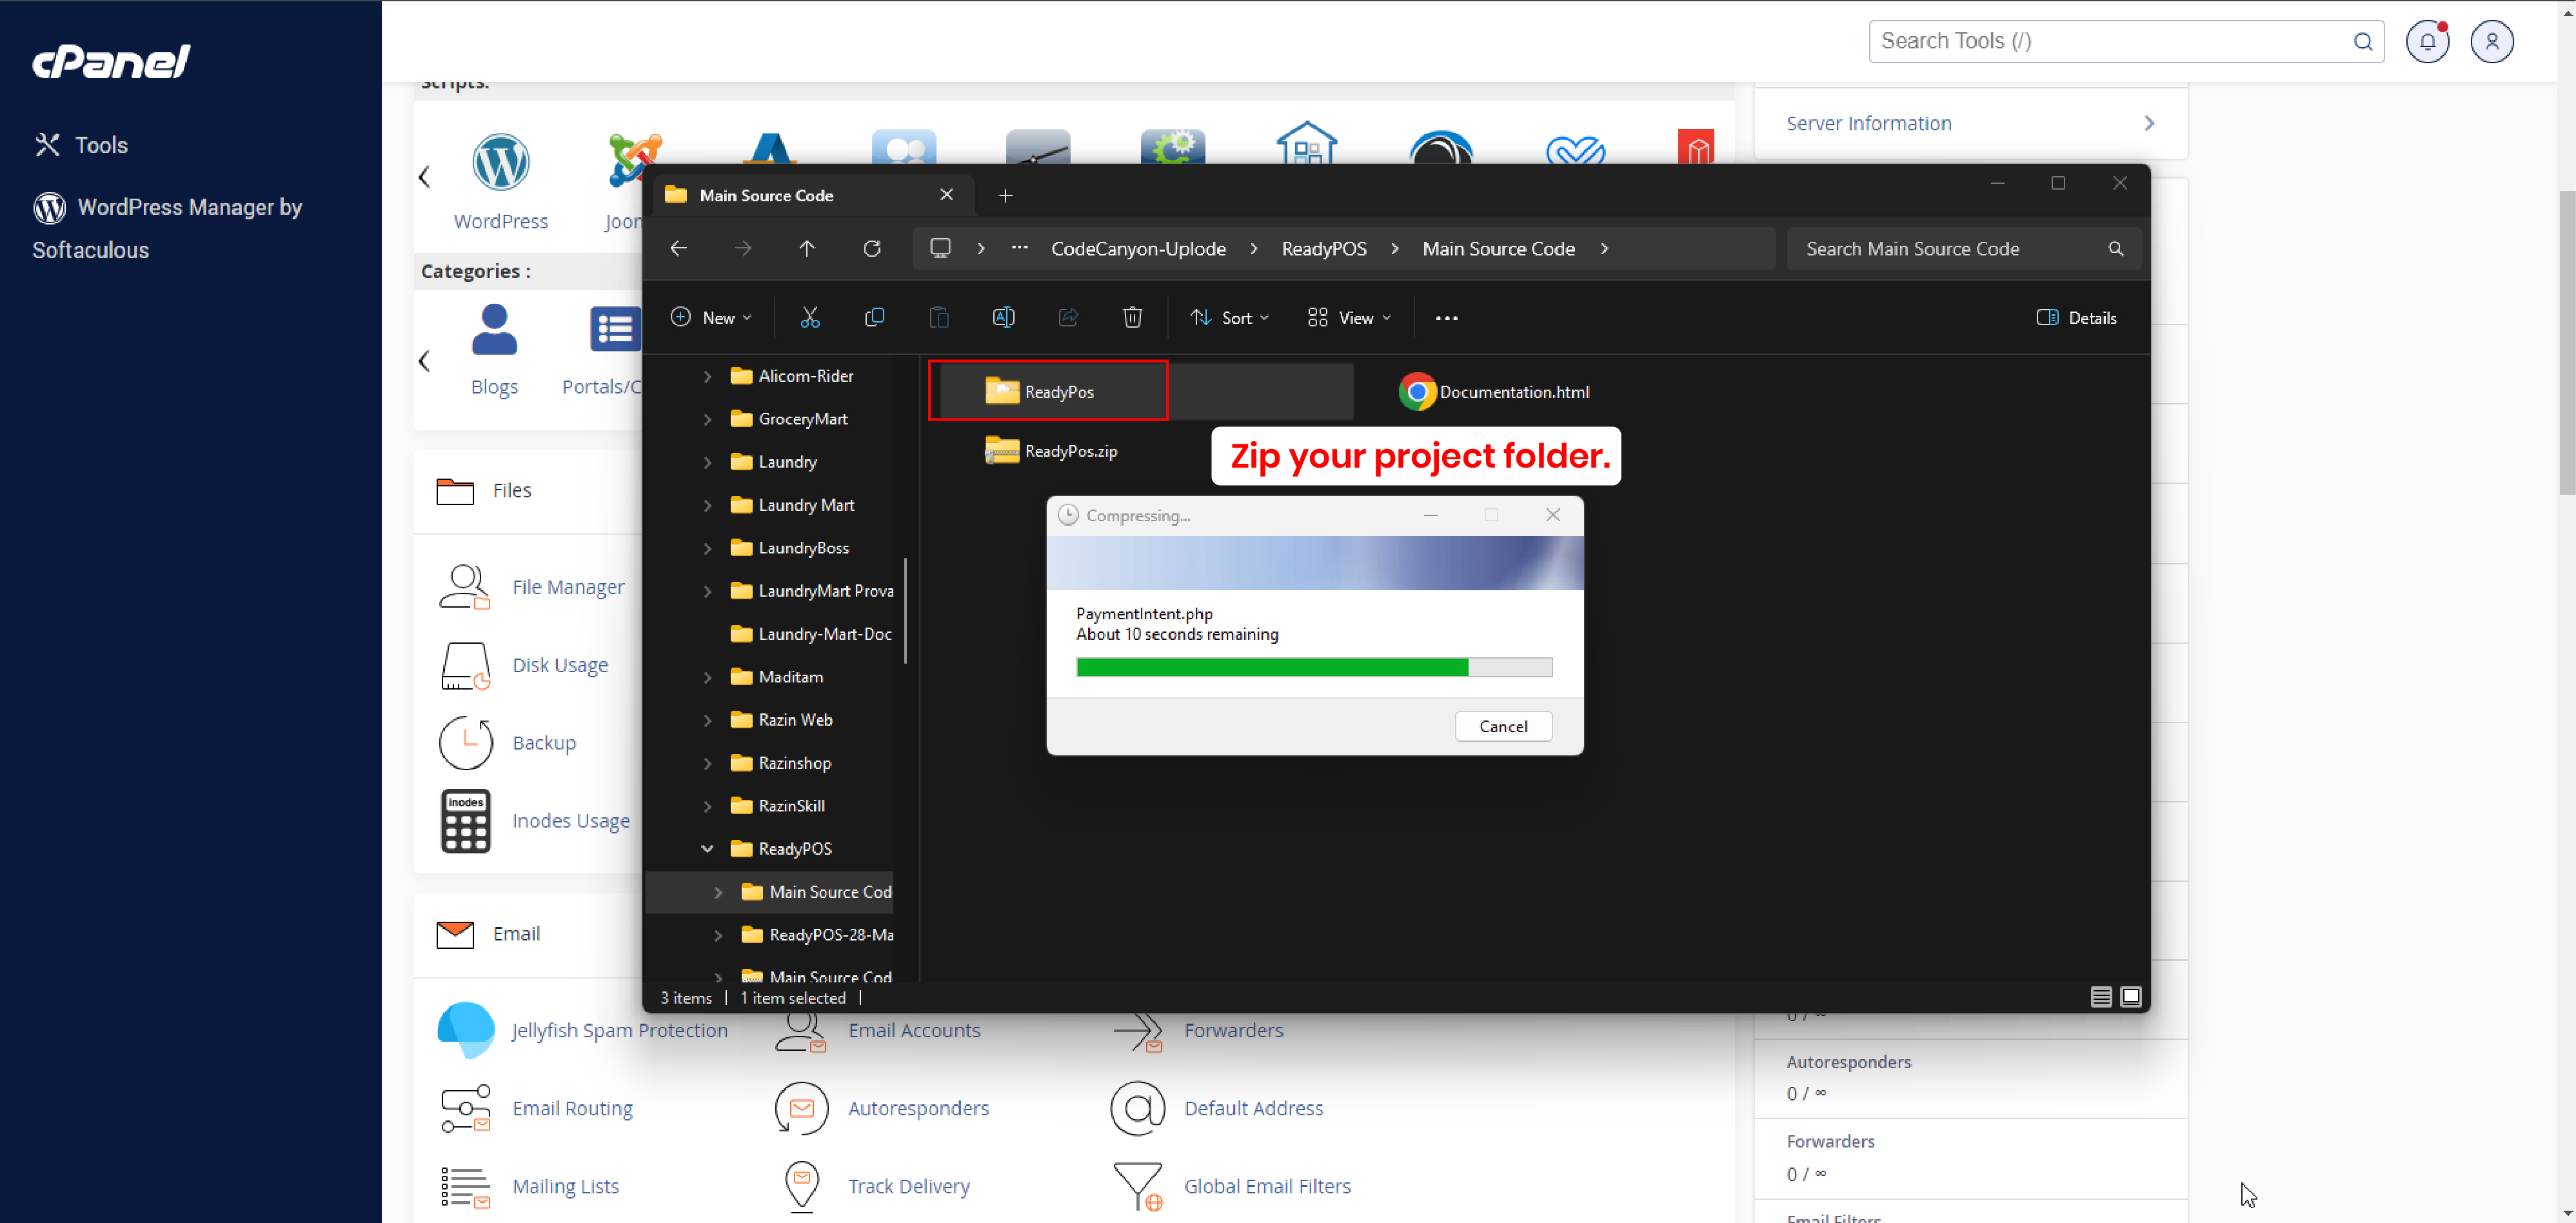
- Zip your project folder.
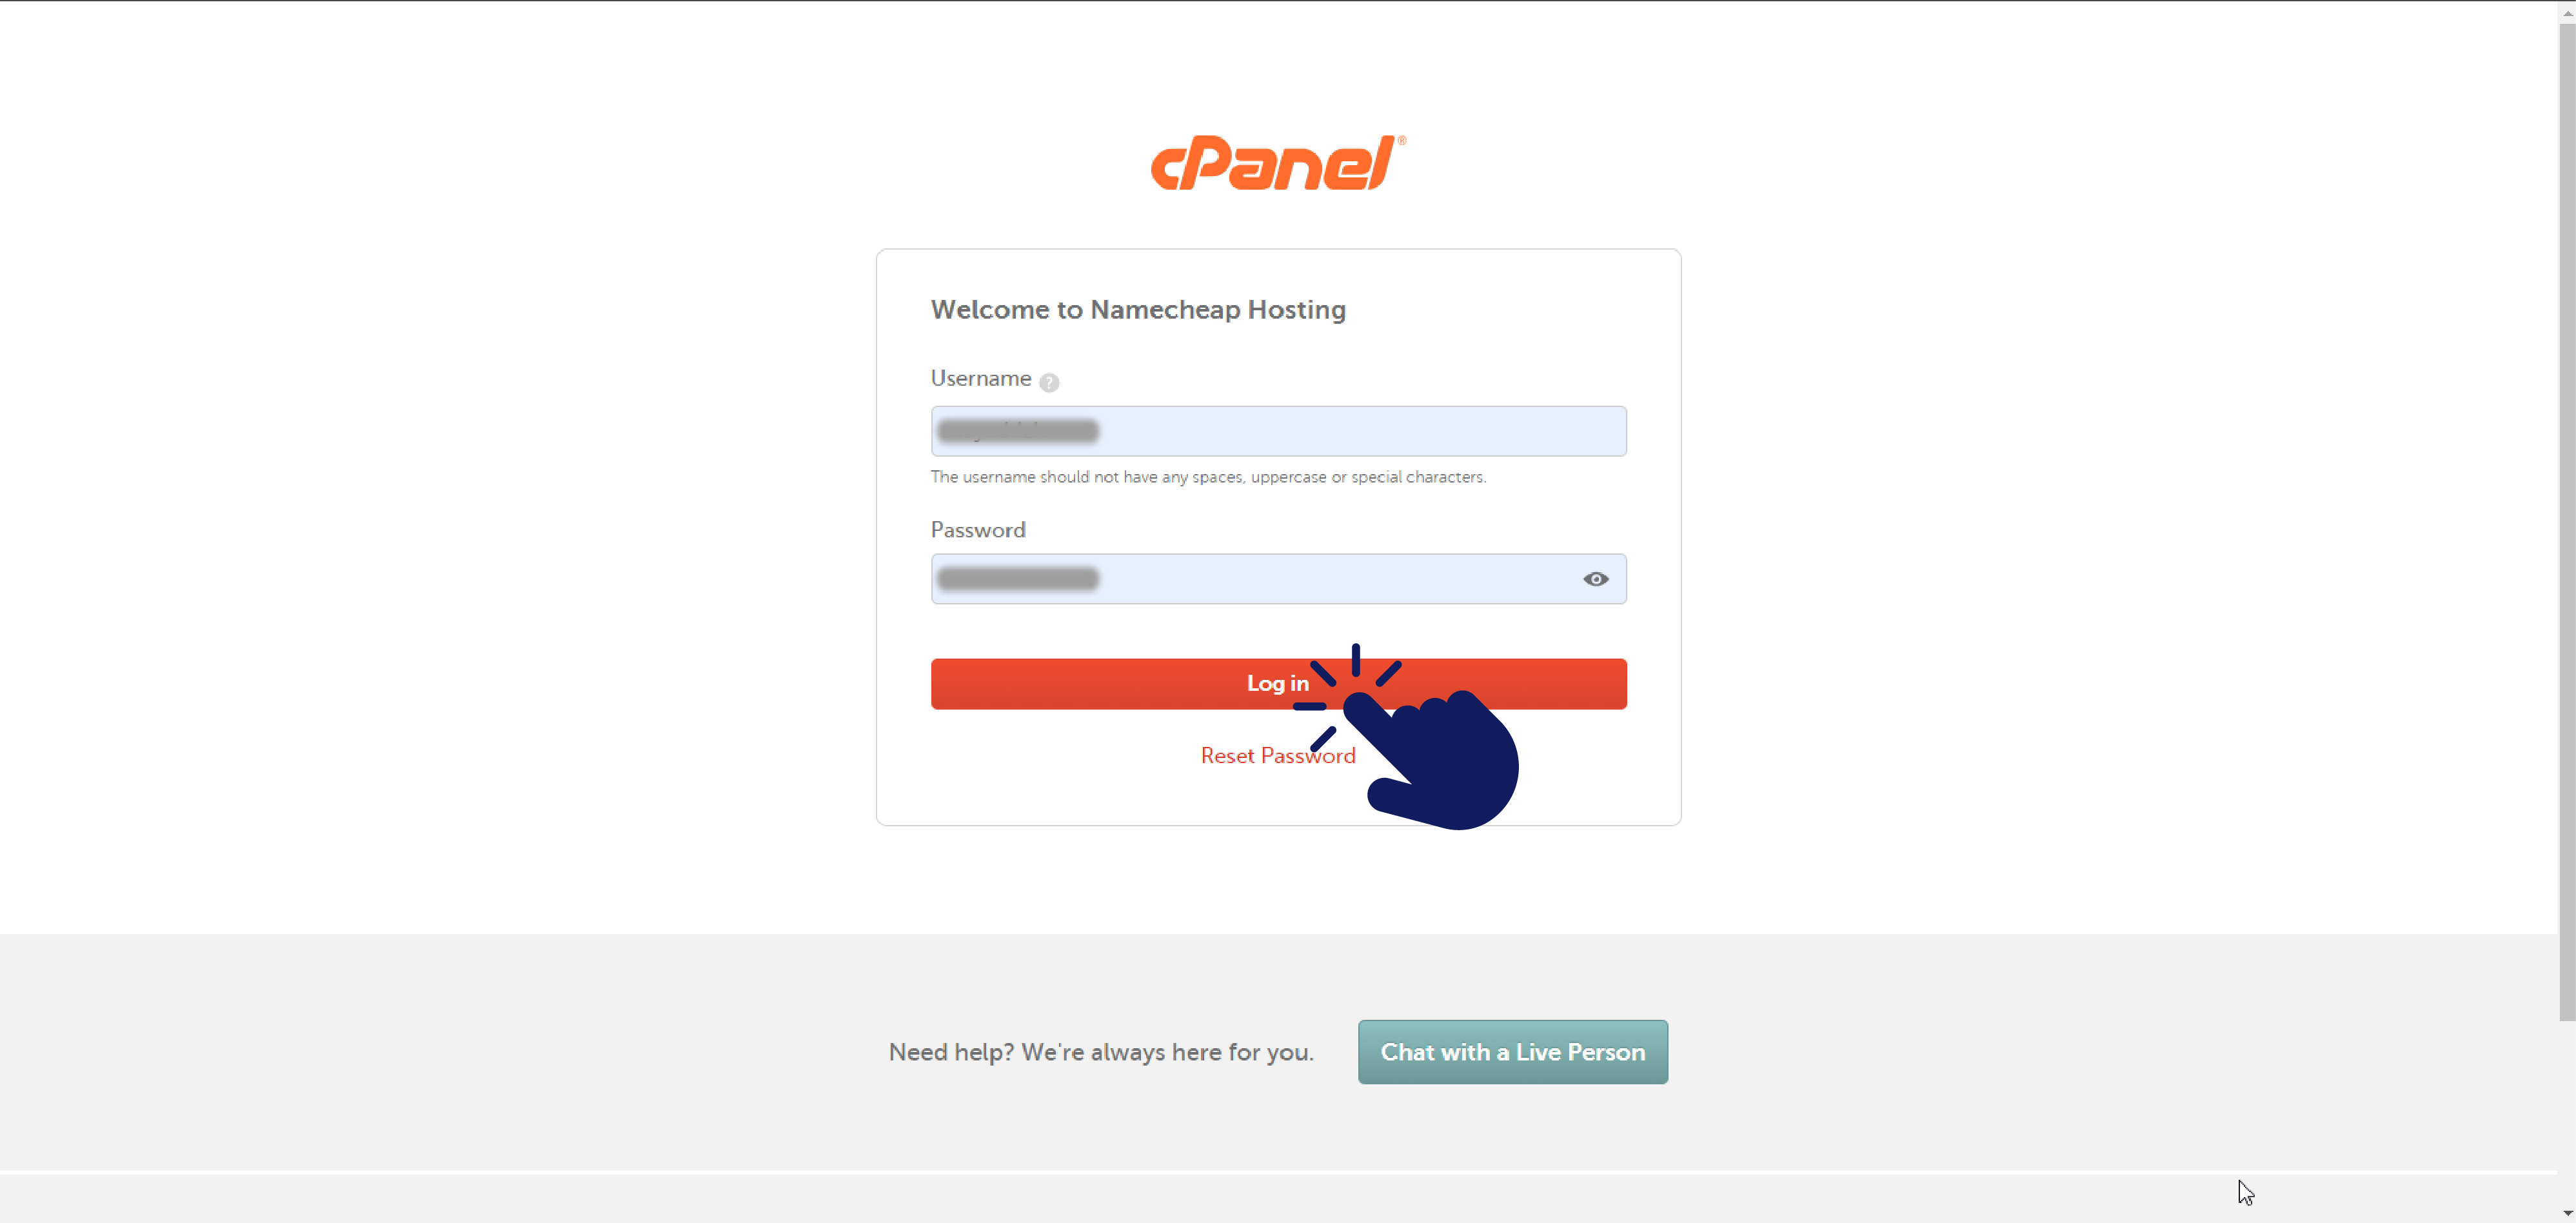
- Login to your cPanel.
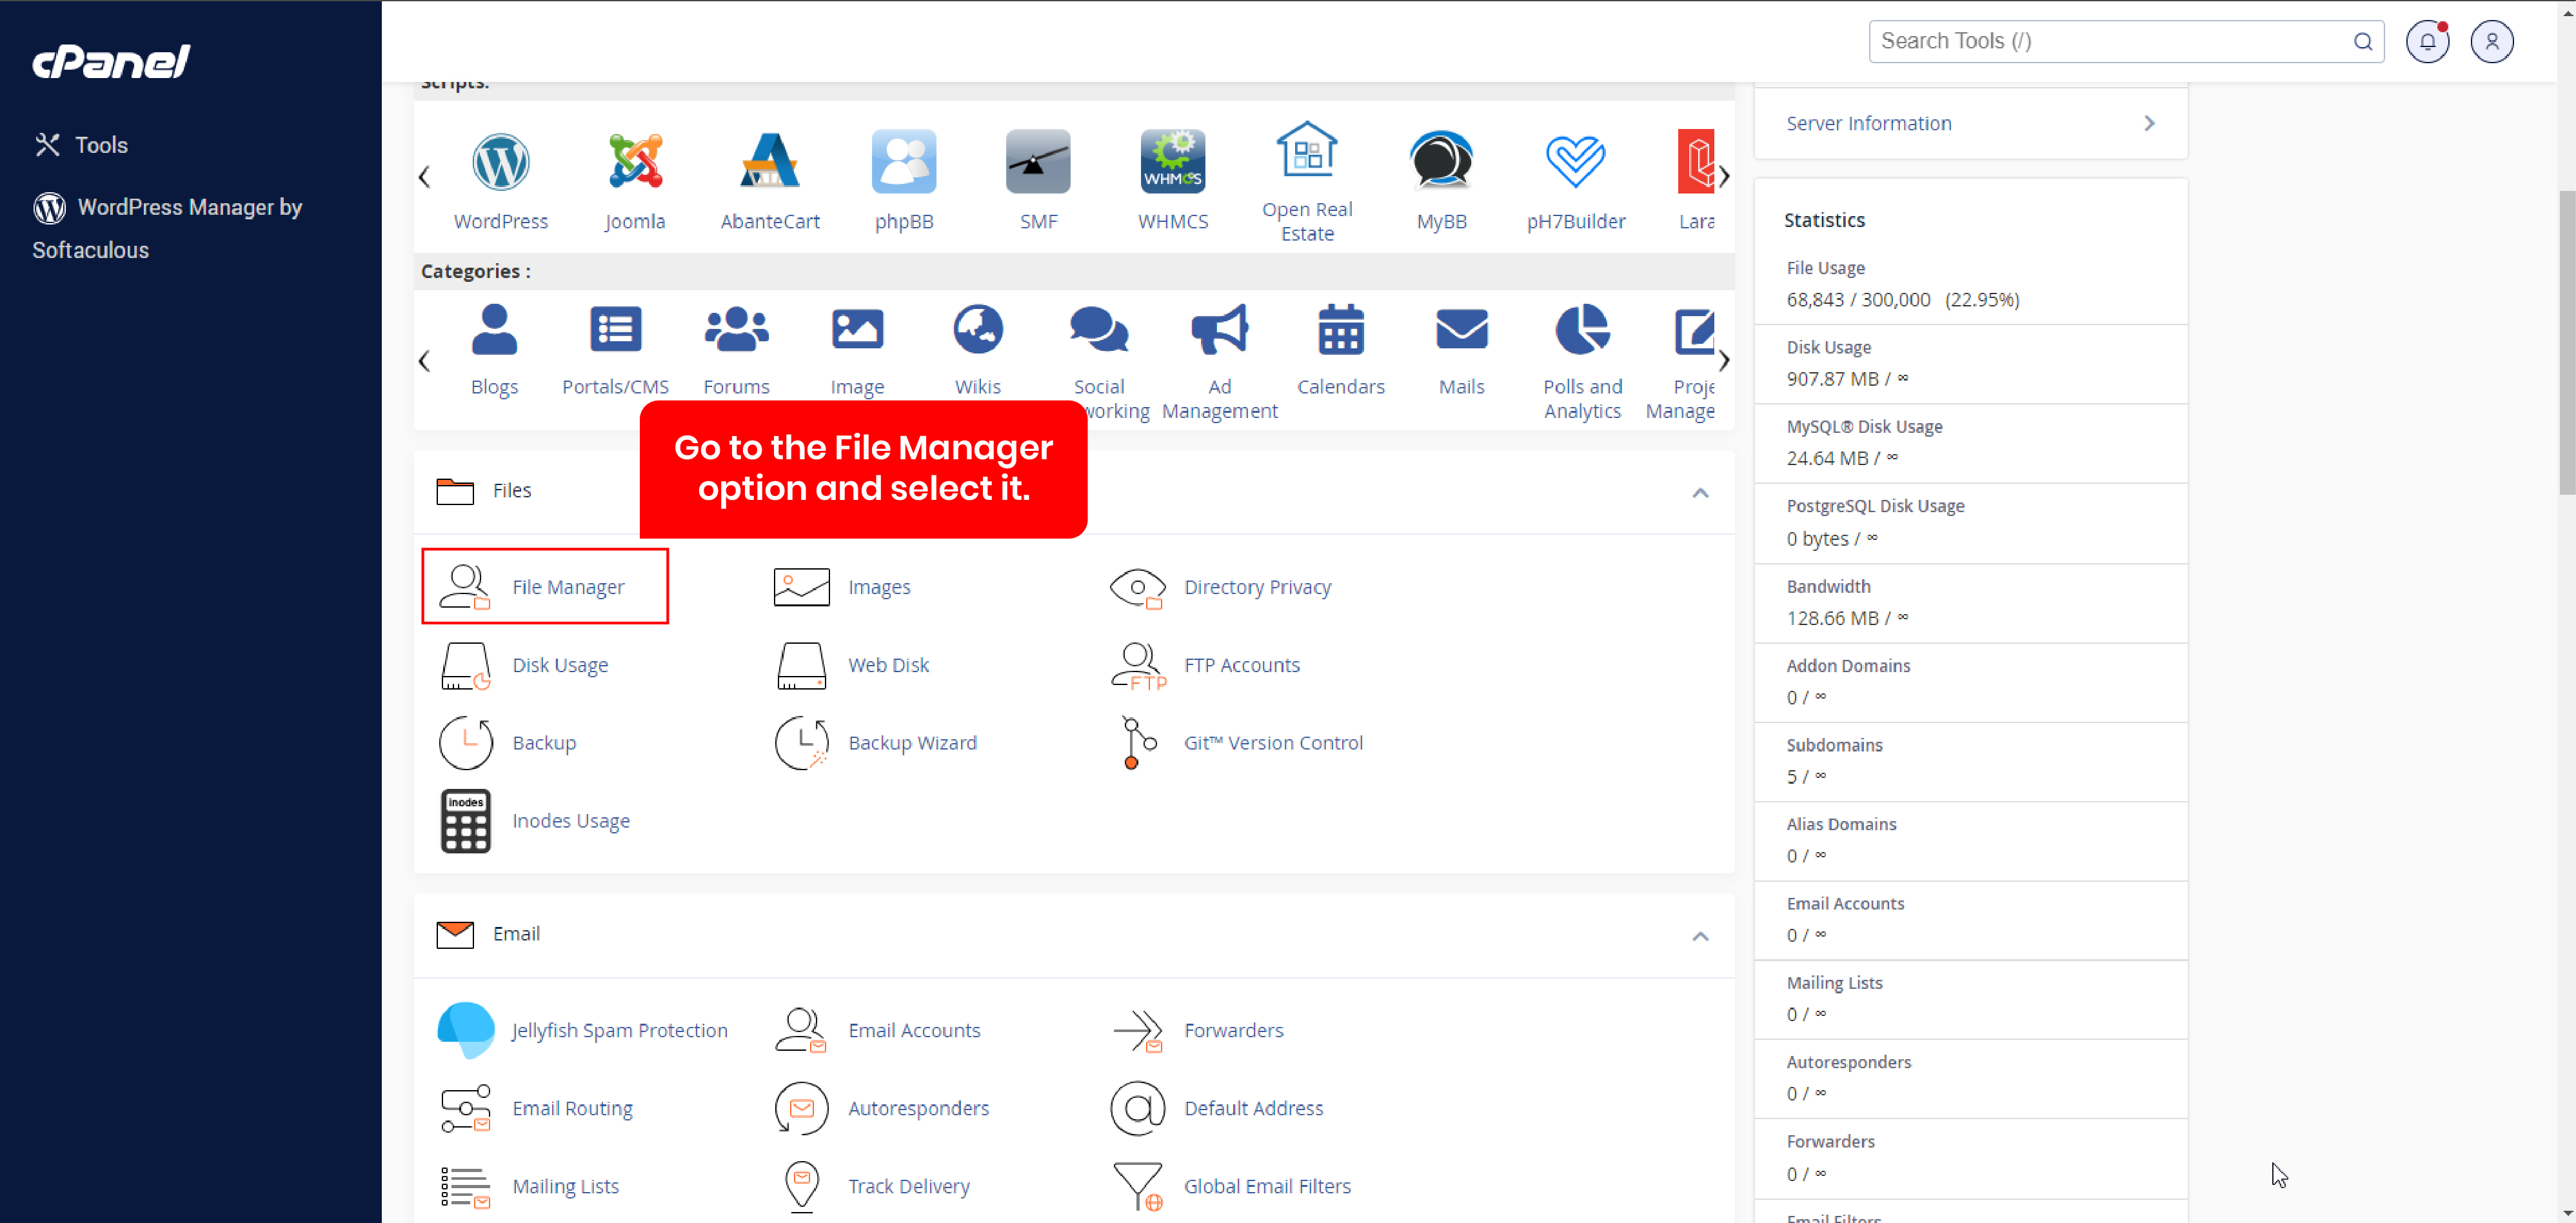
- Go to the File Manager option and select it.
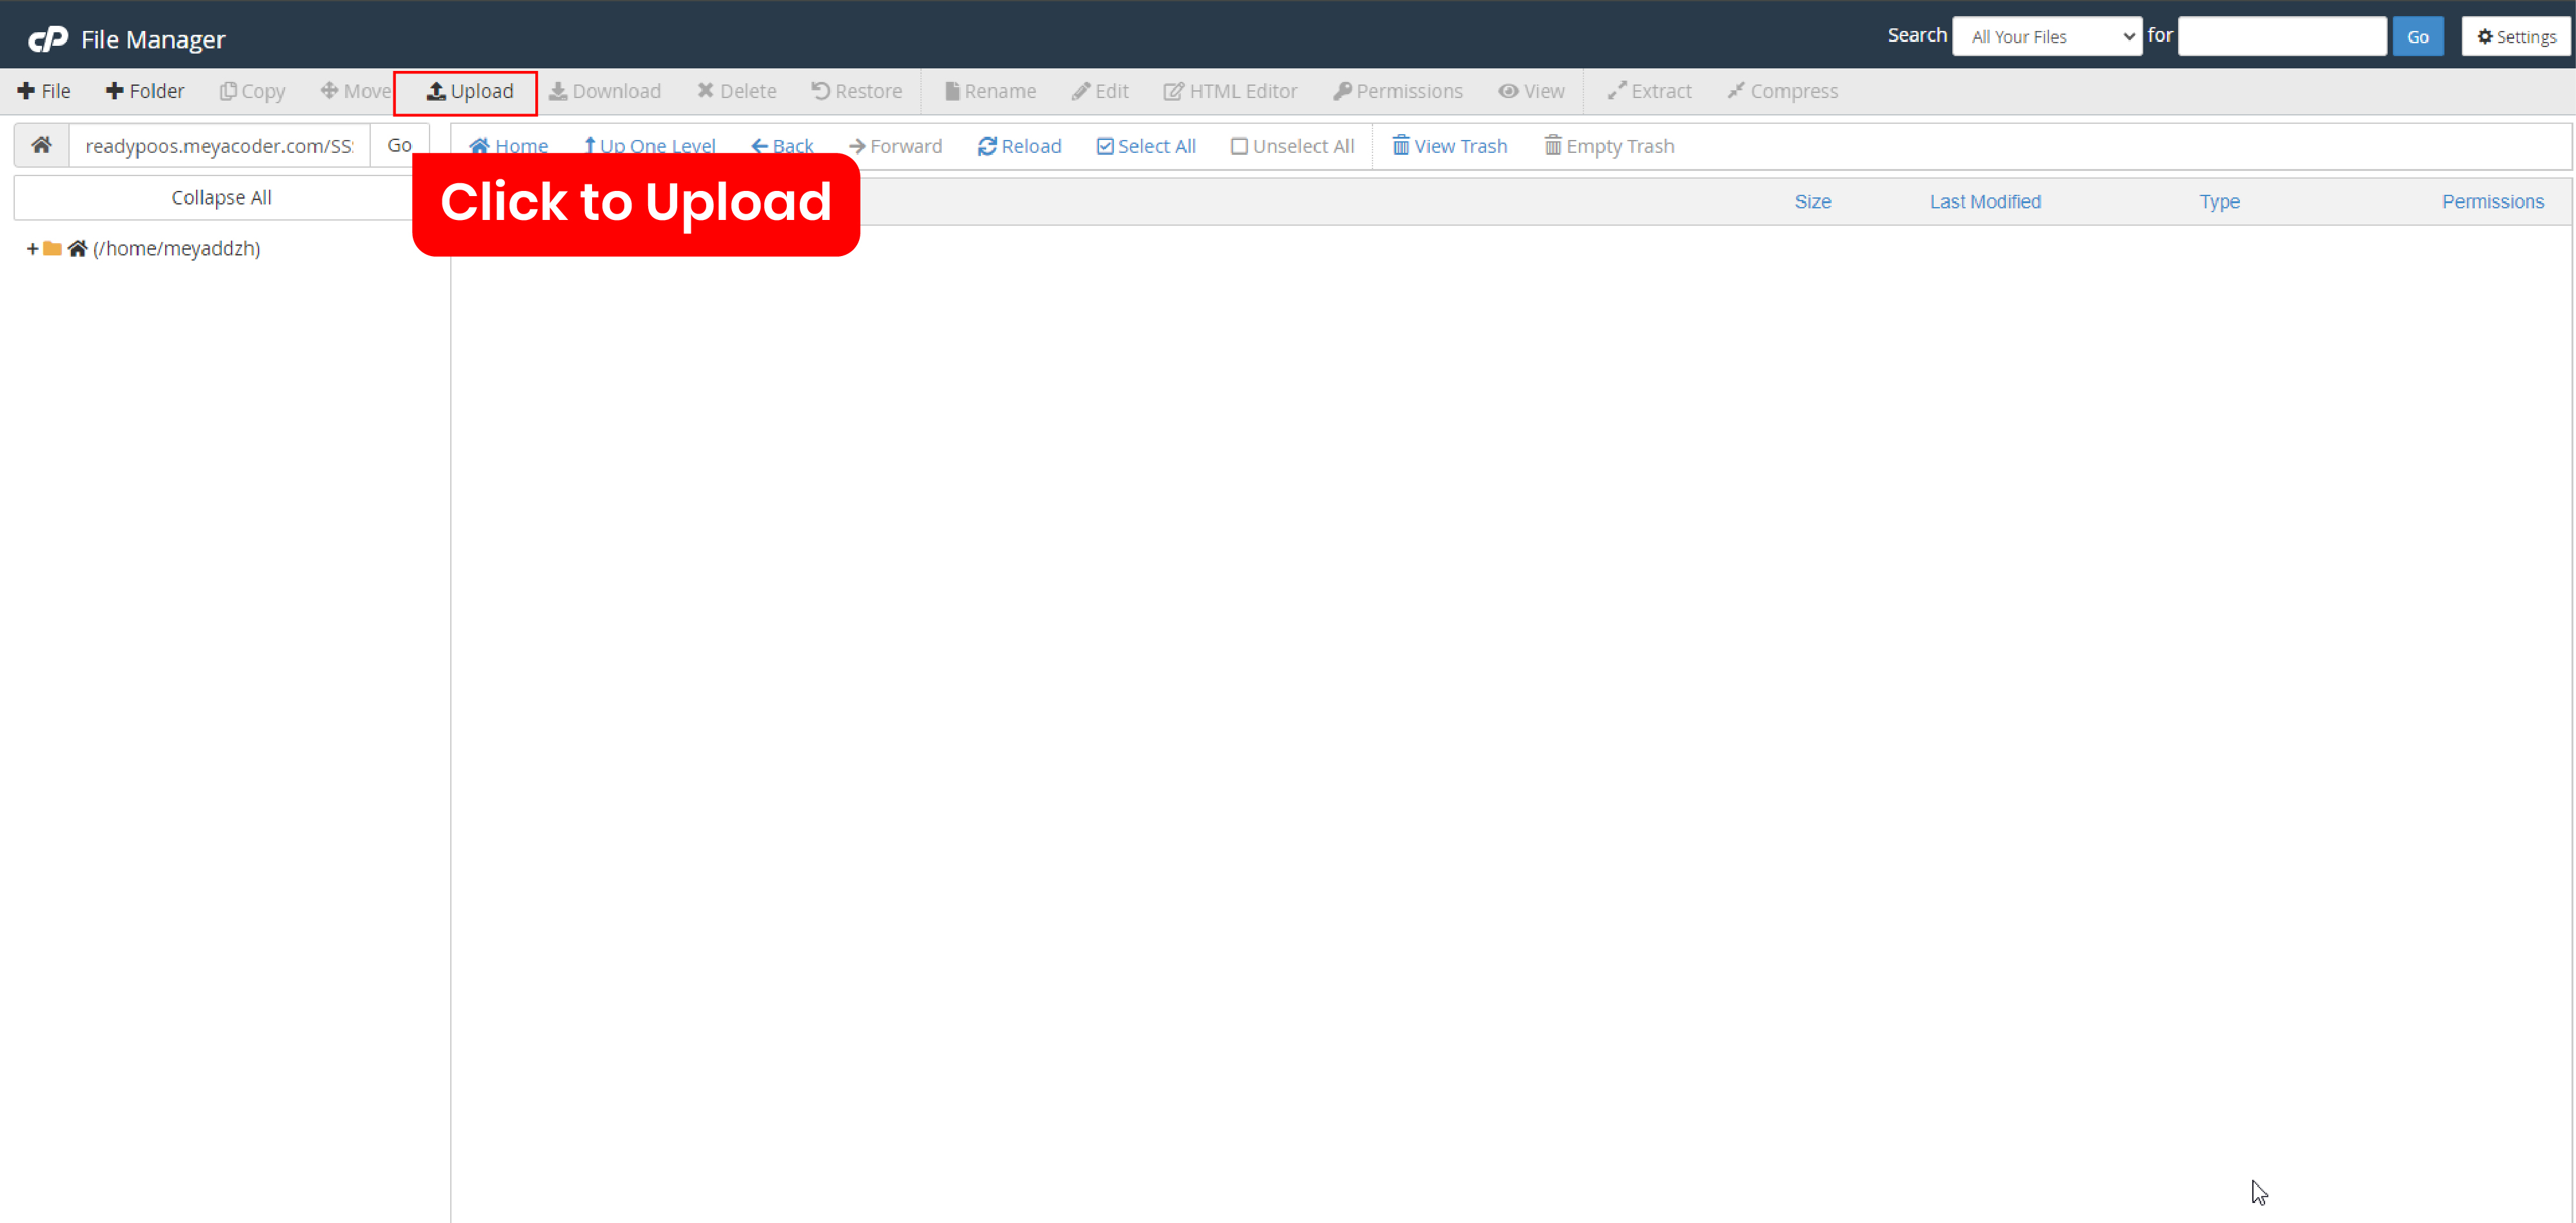
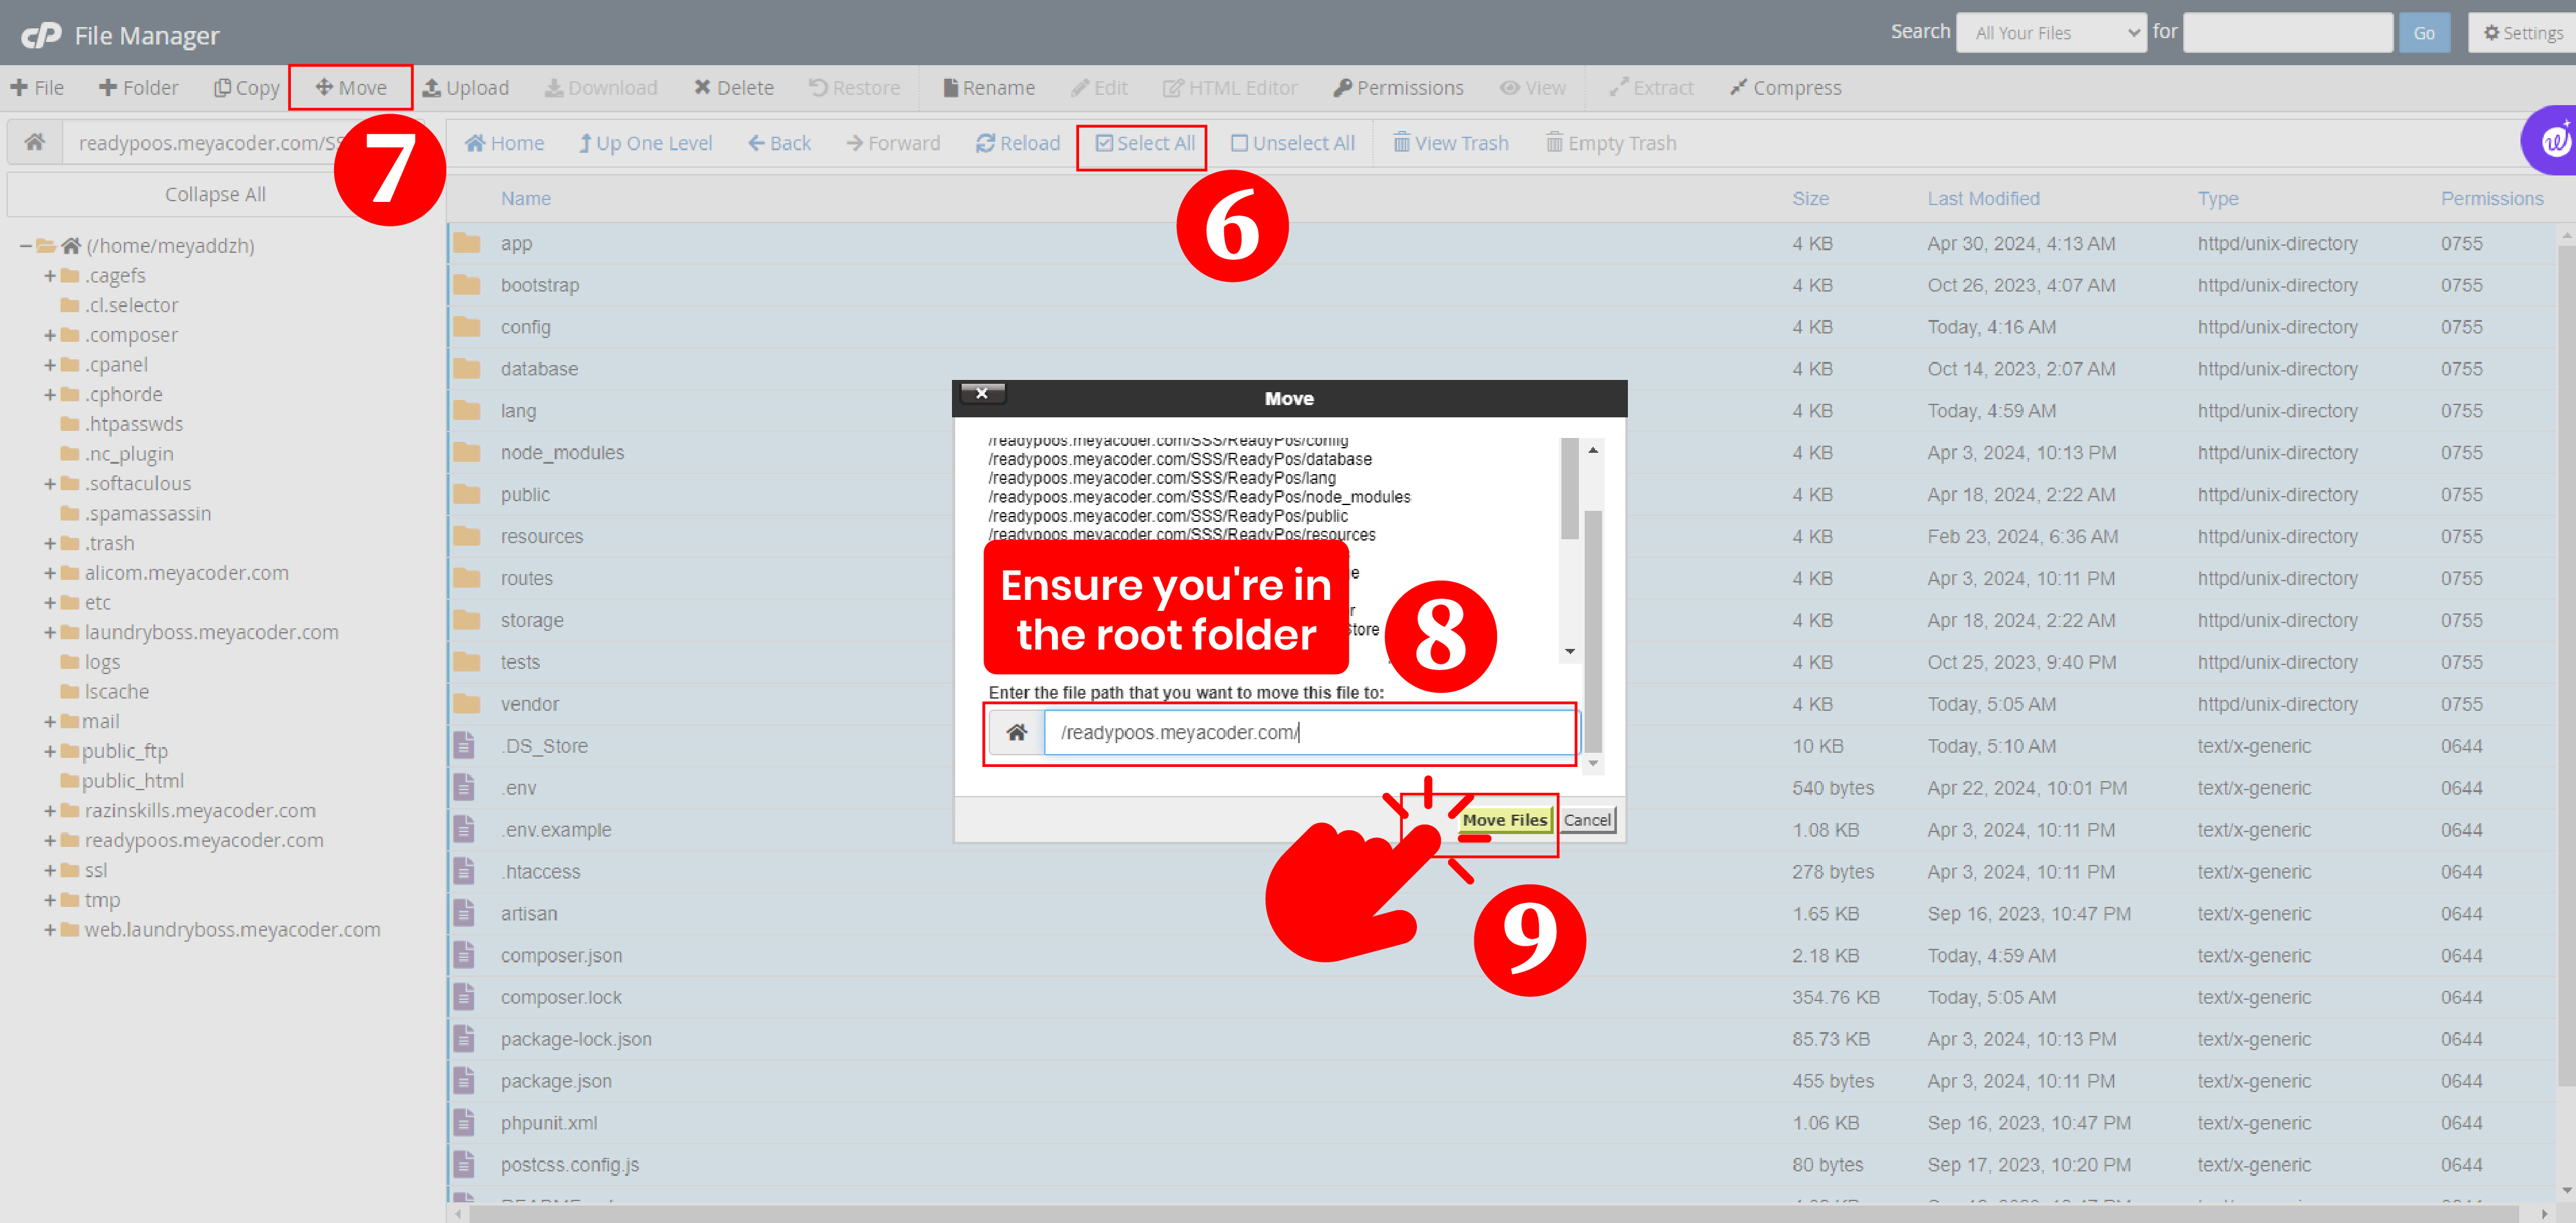
- Ensure you're in the root folder, then click "Upload".
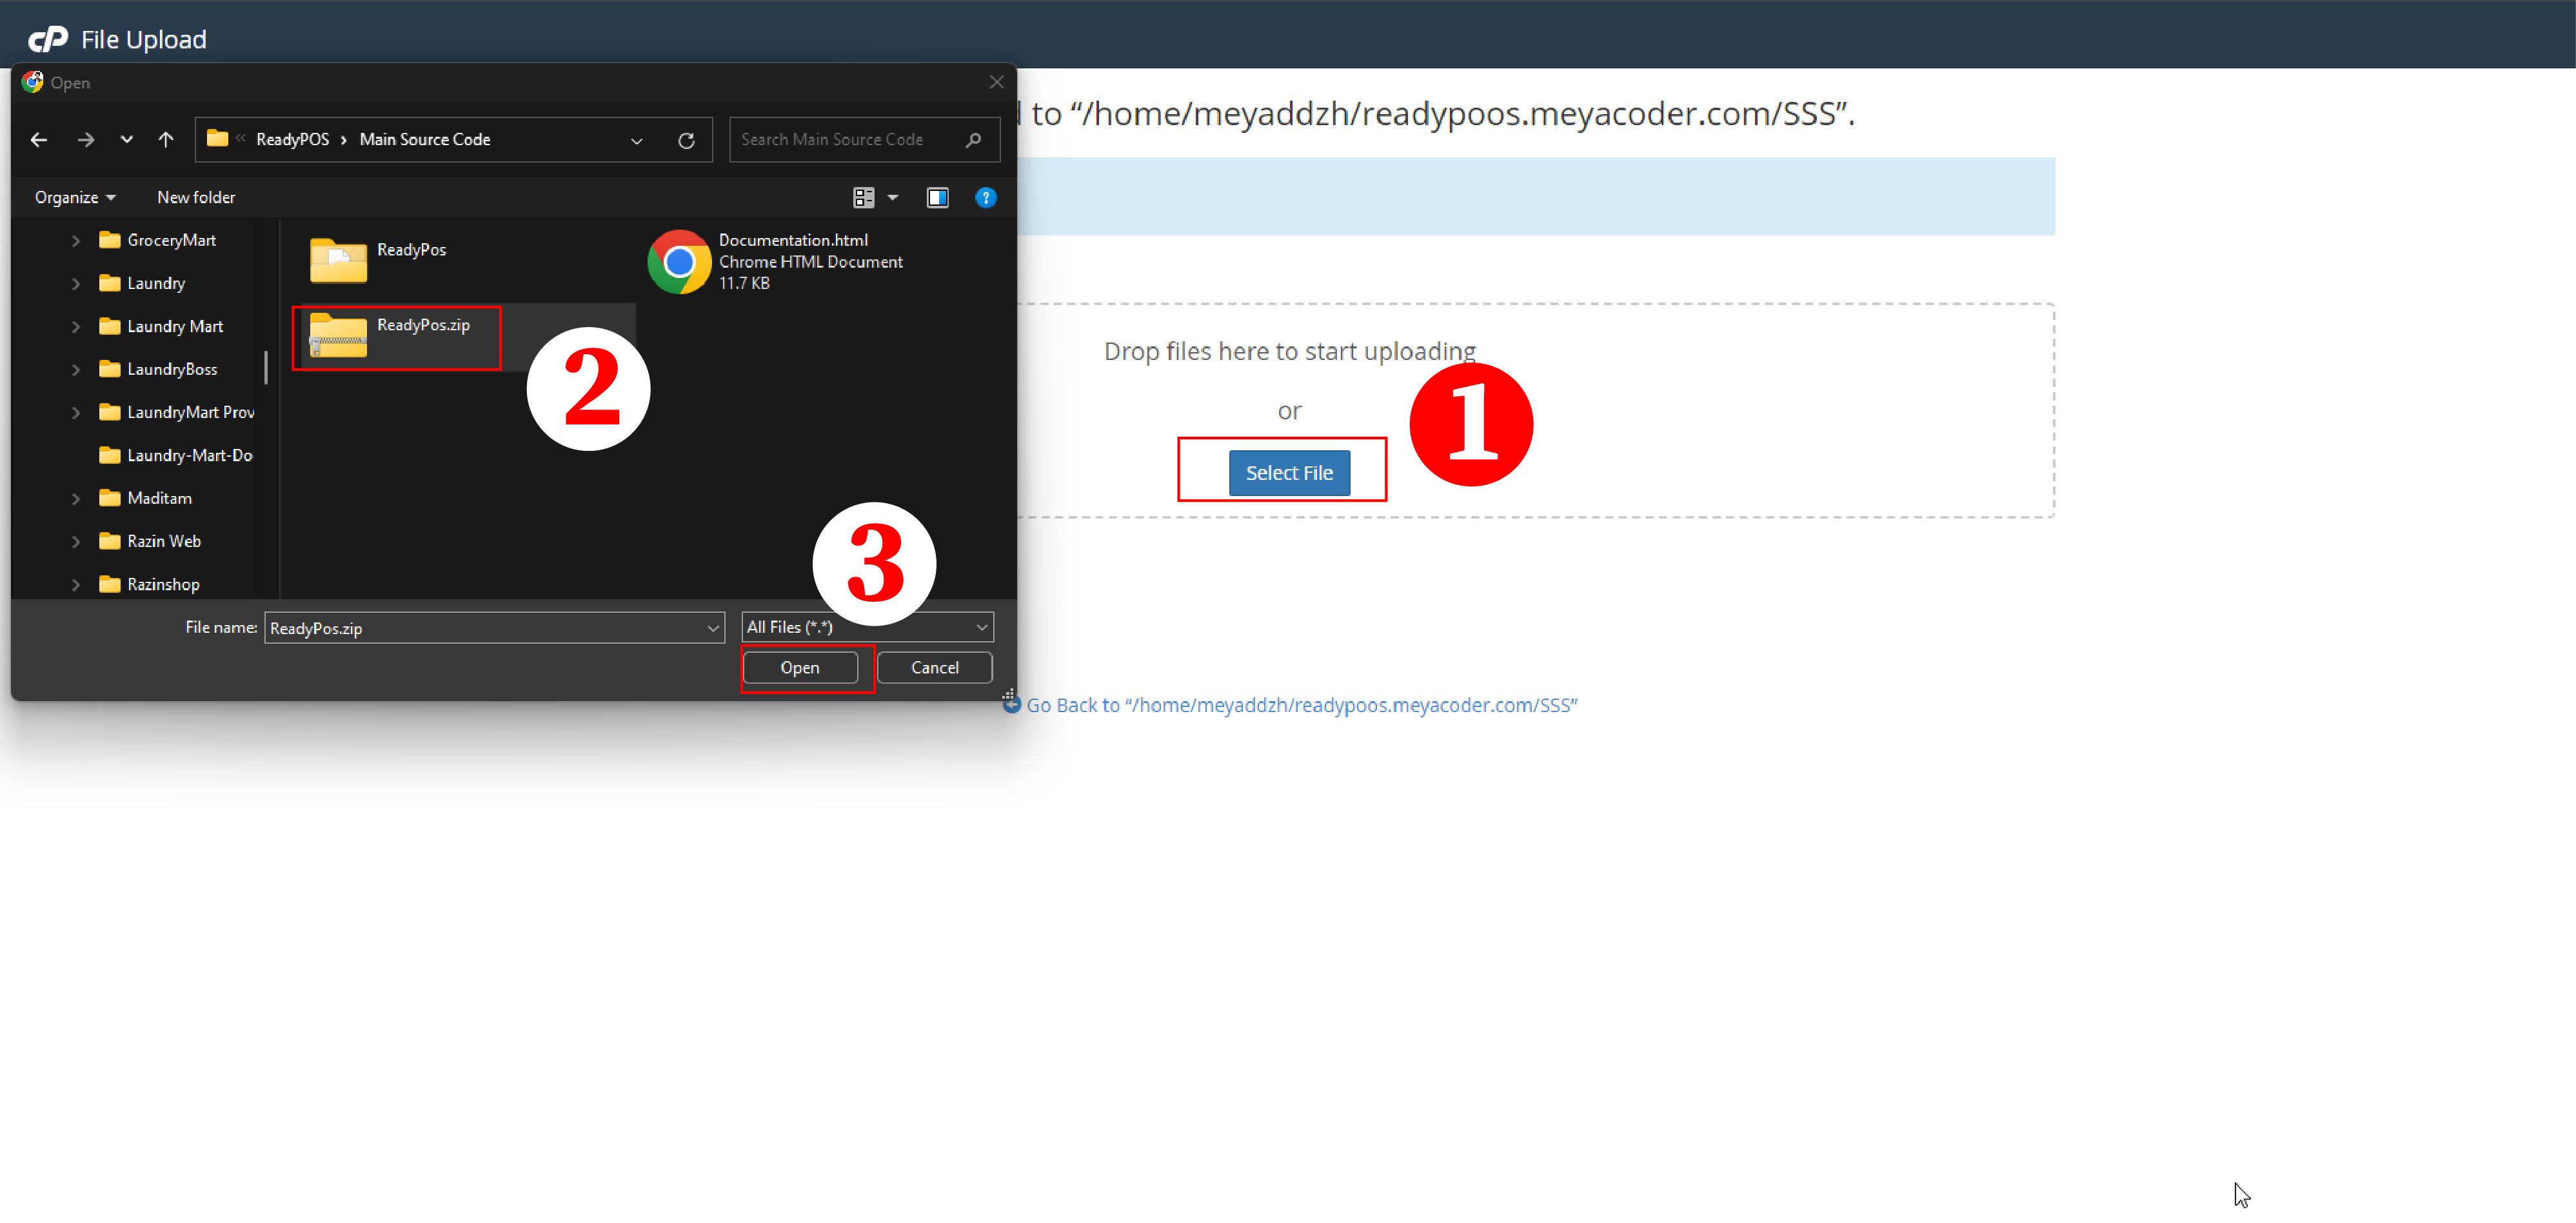
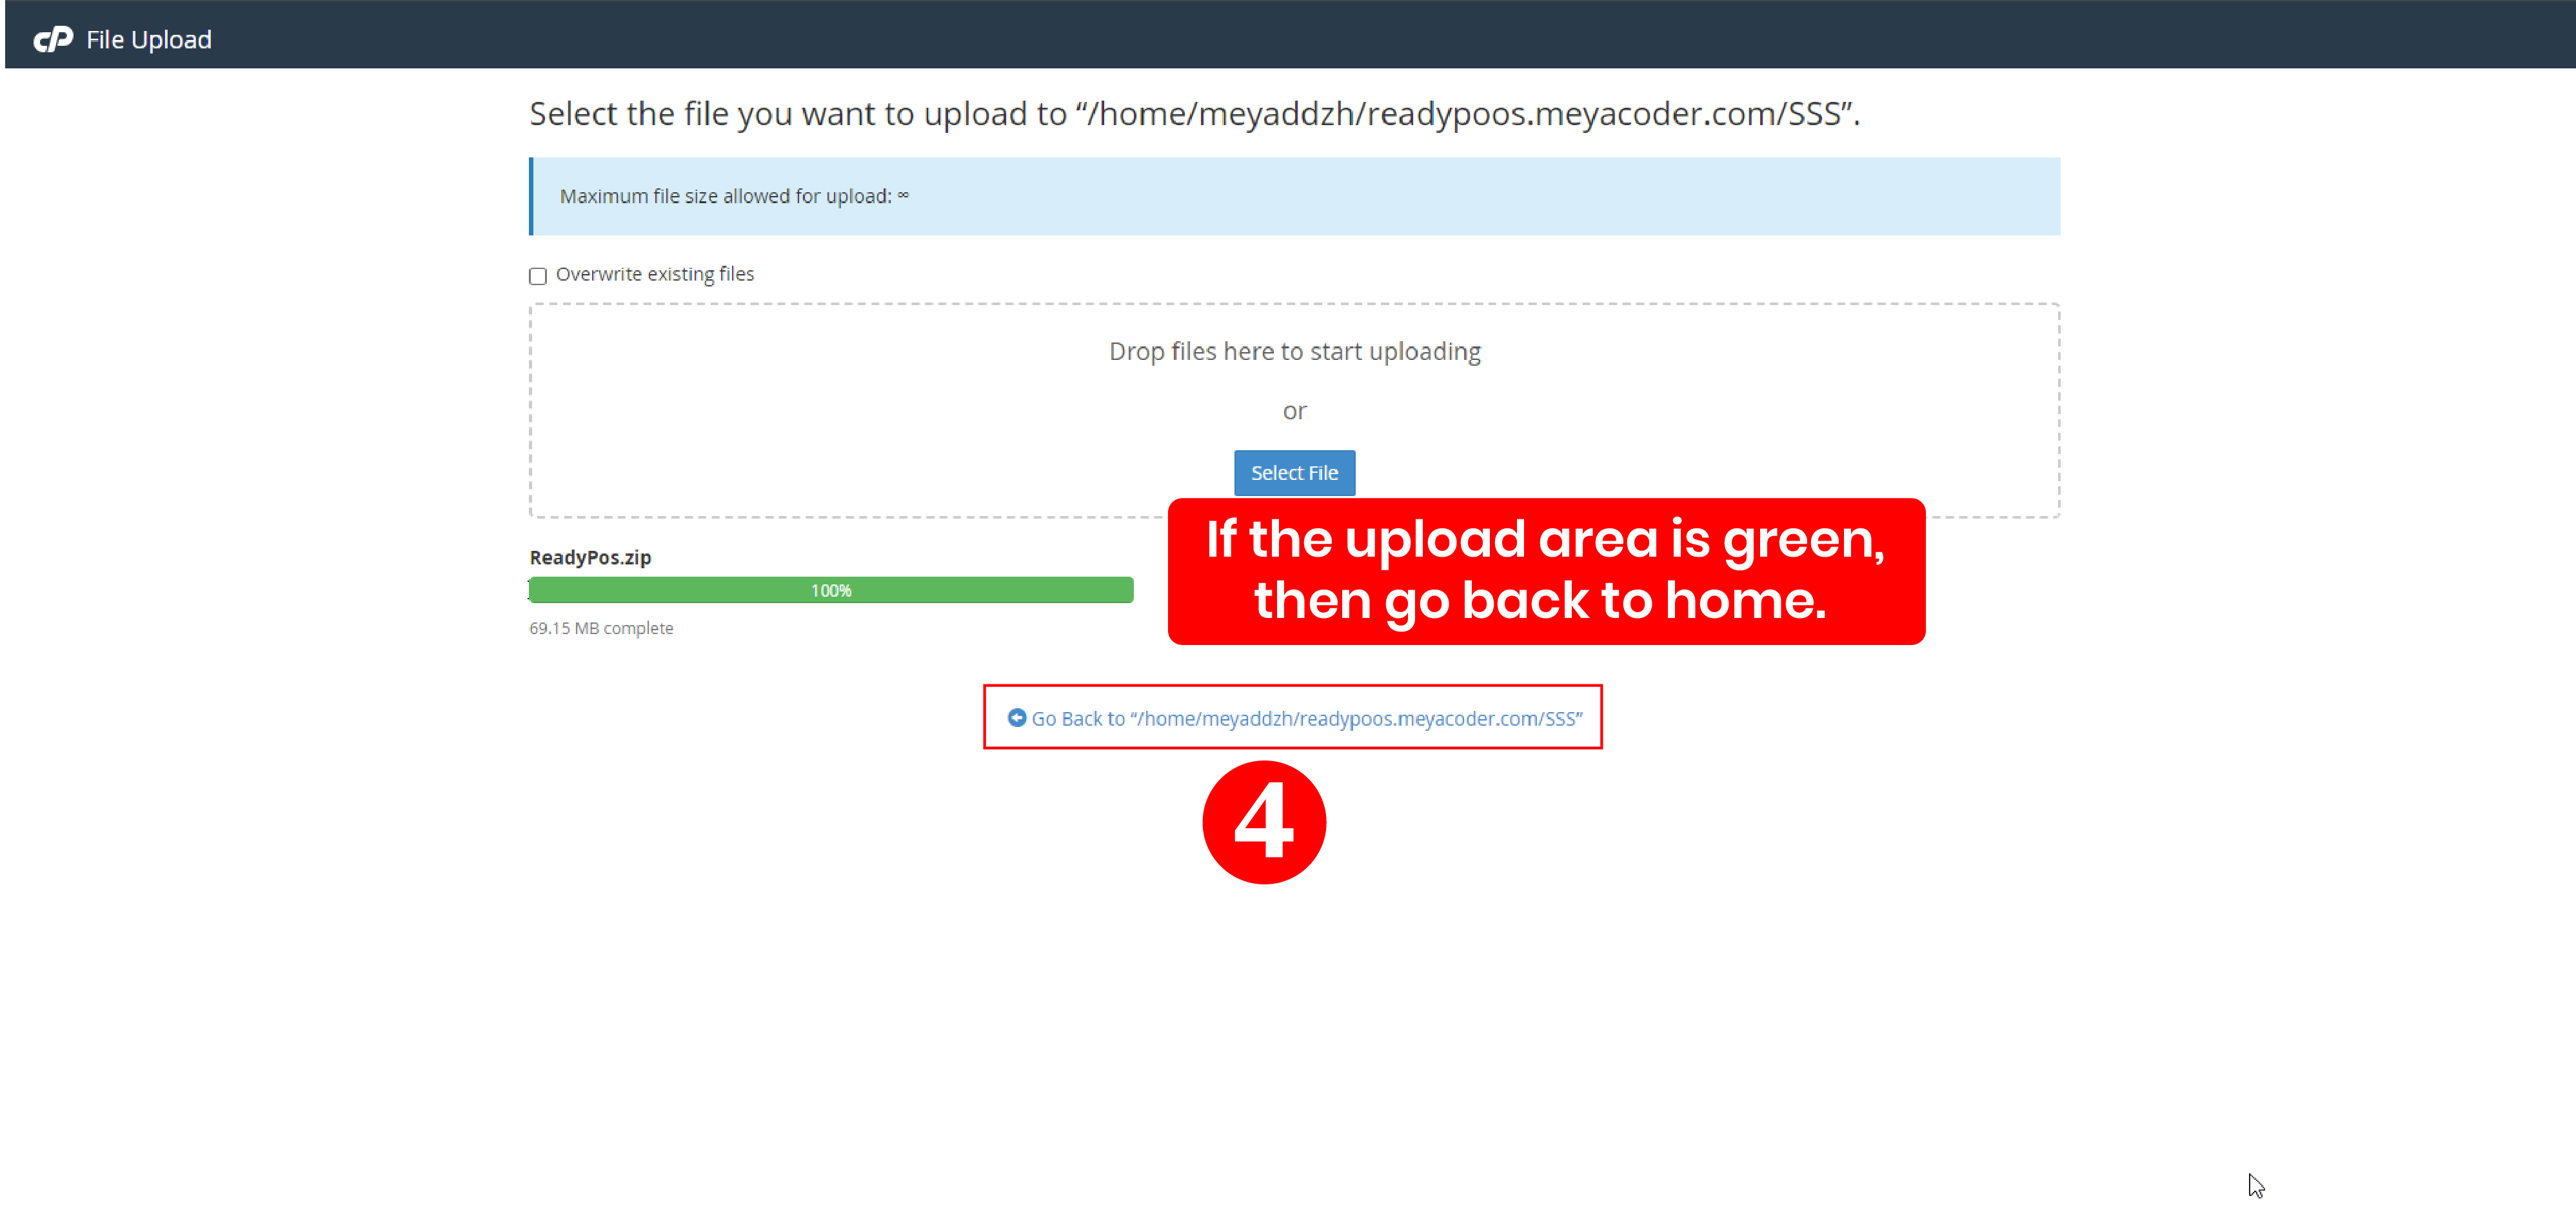
- Select your zip folder and wait for the upload to complete. If the upload area is green, then go back to home.
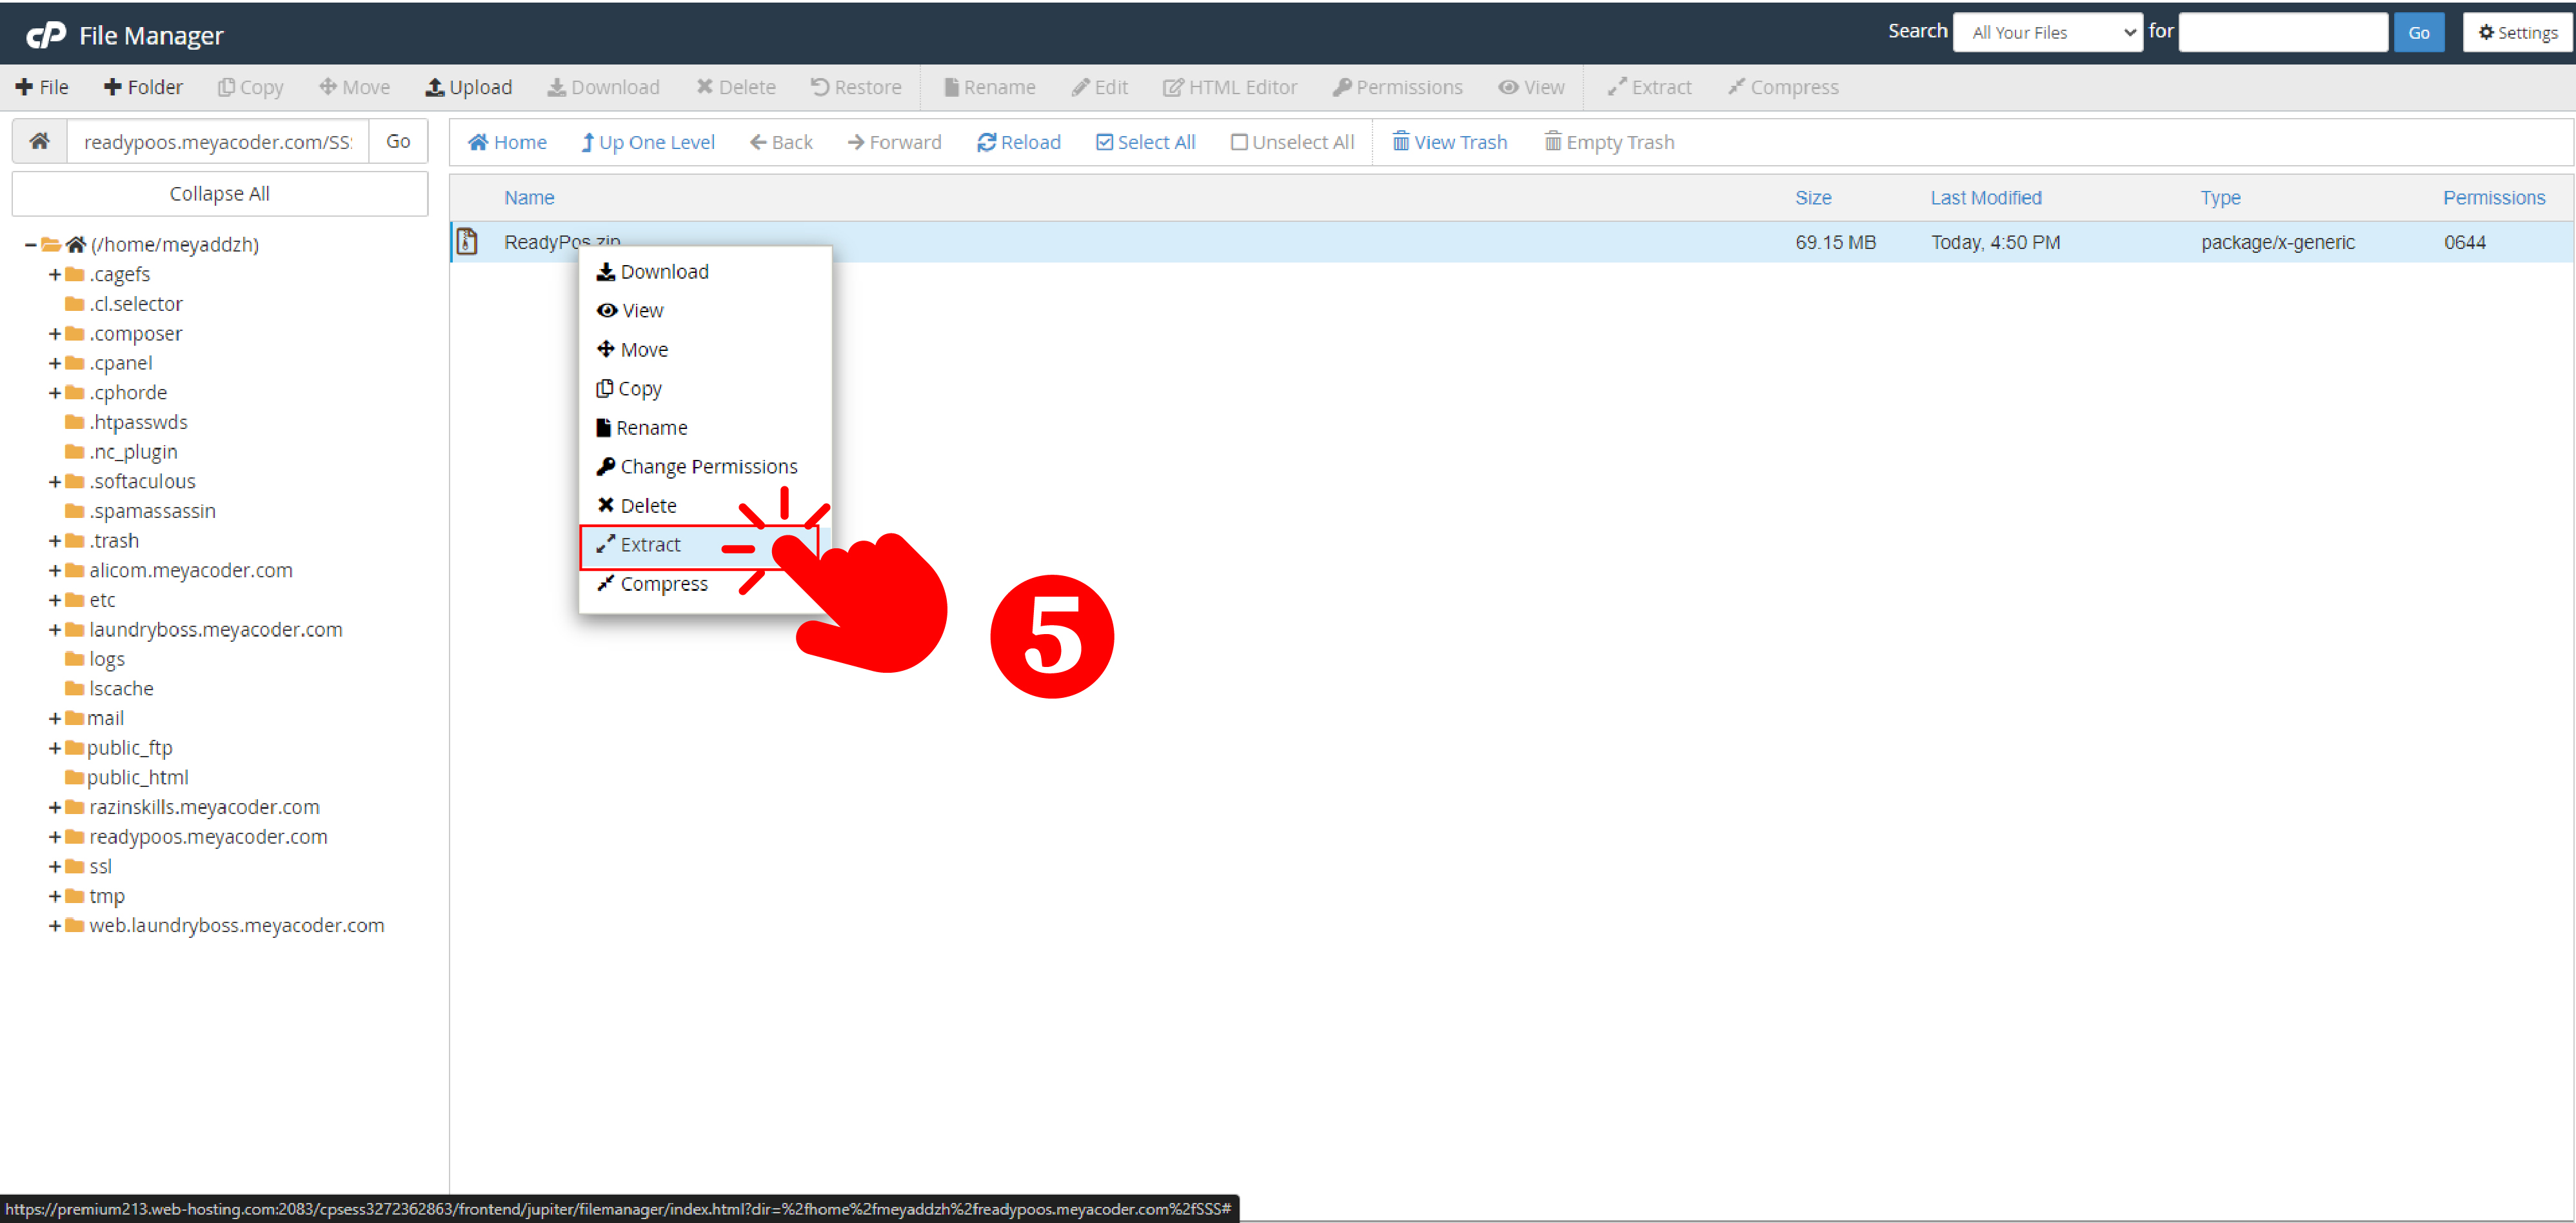
- Unzip the uploaded folder.
- Selectall files and directory move to the root folder.
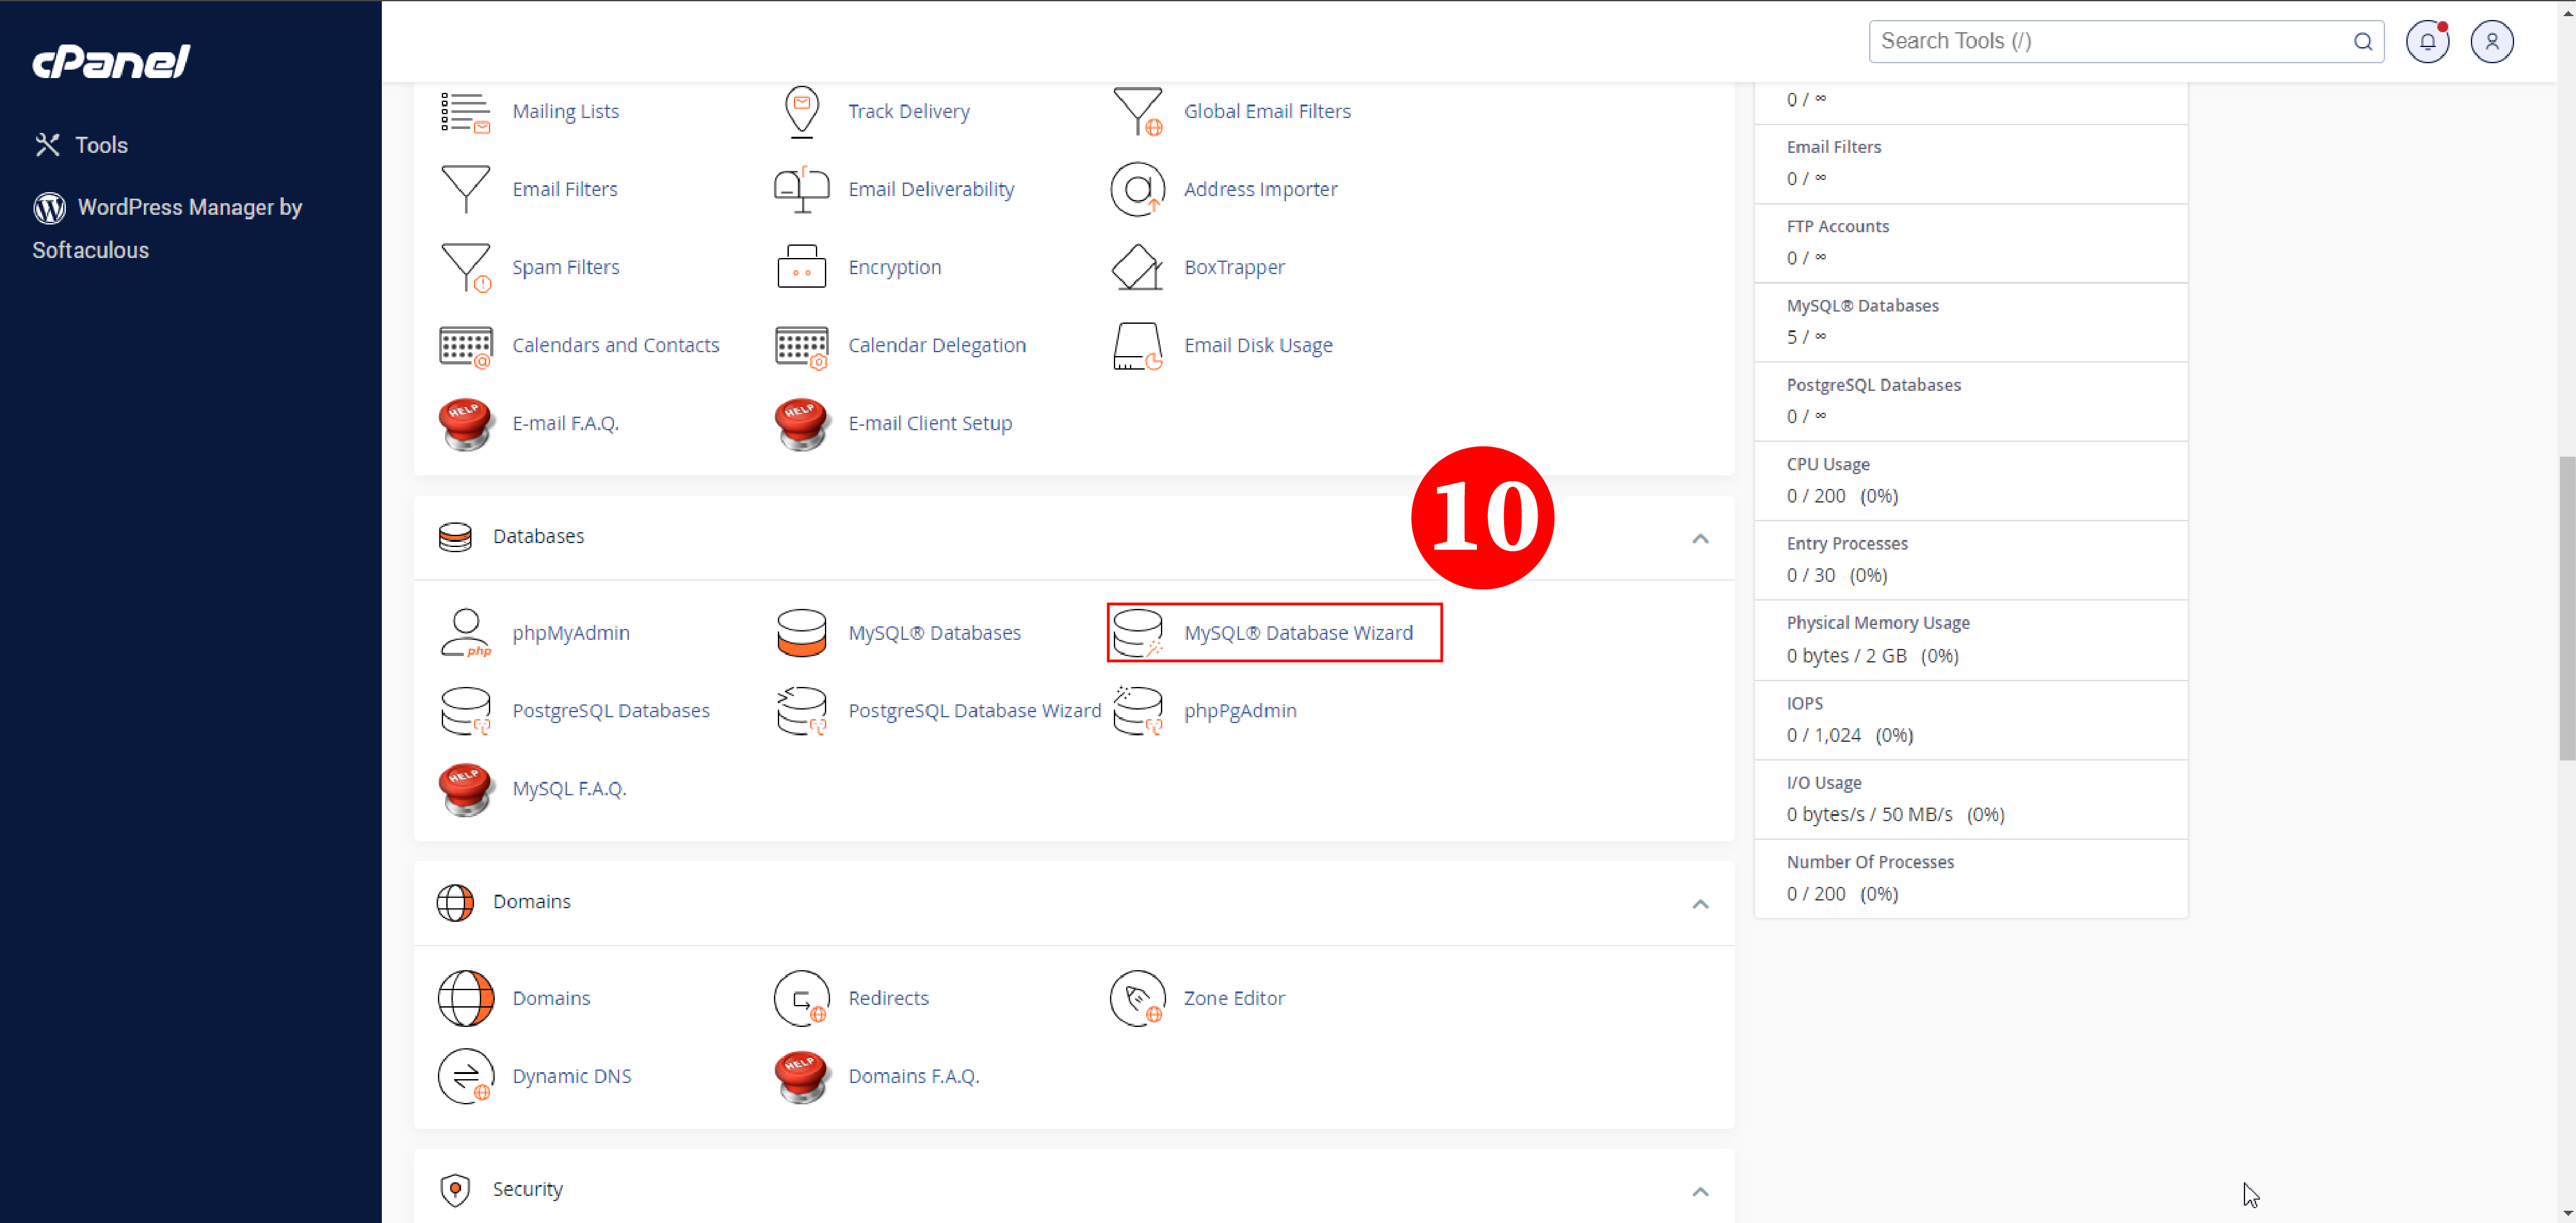
- Go back to Cpanel and navigate to Database.
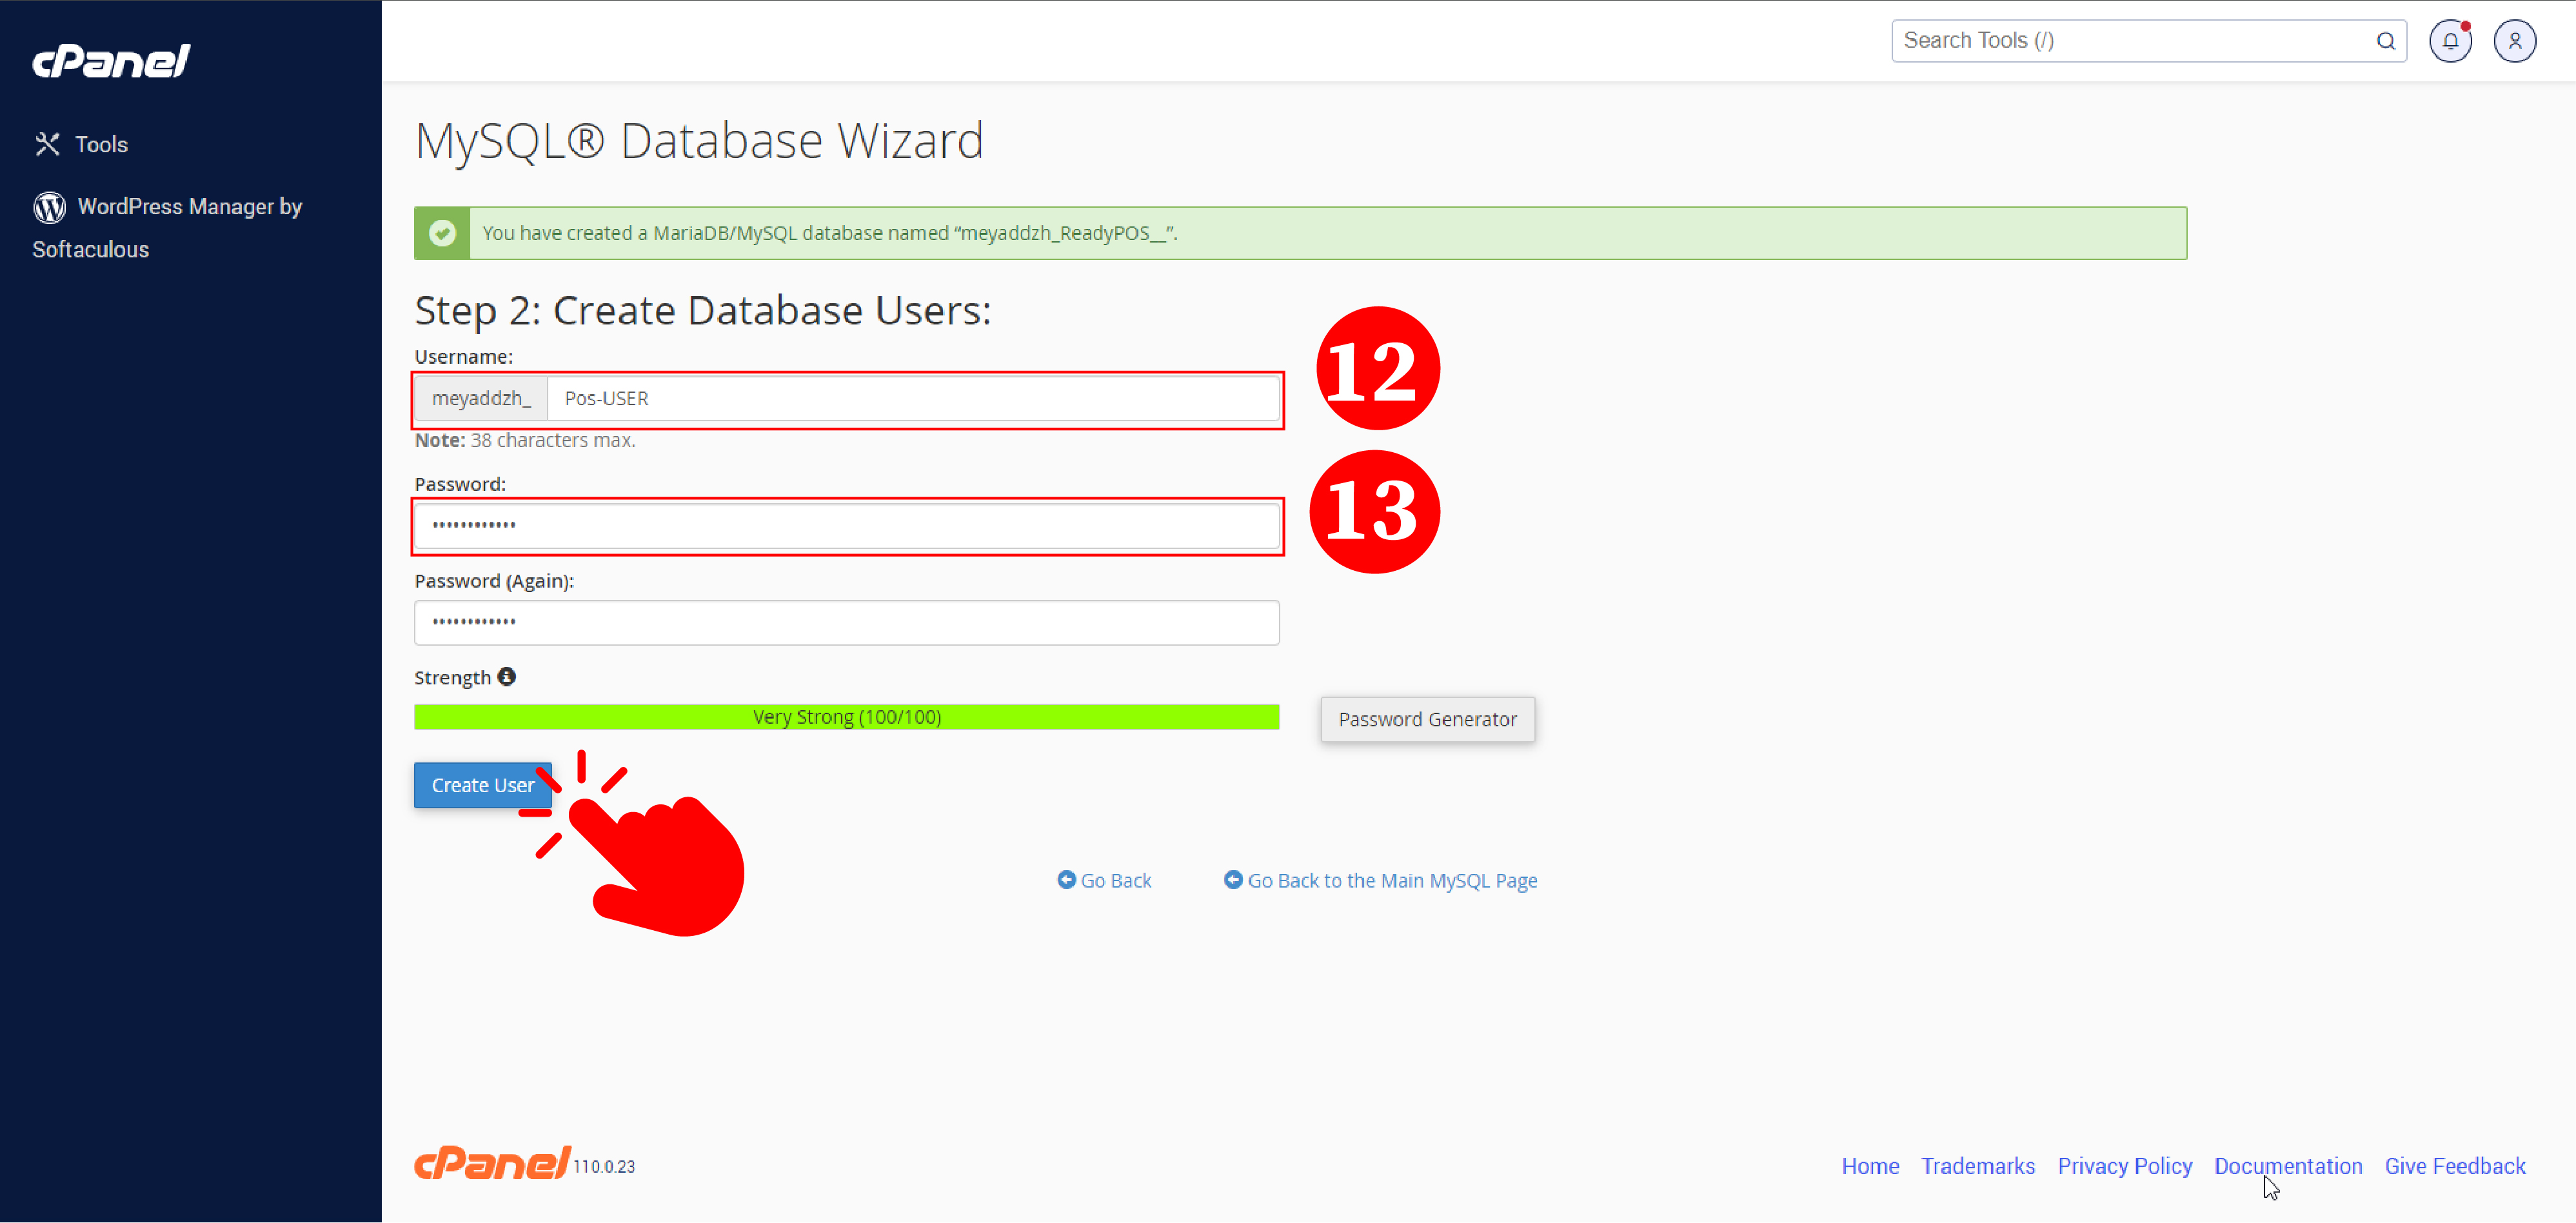
- Created a database and add (create if non exist) a DB user.
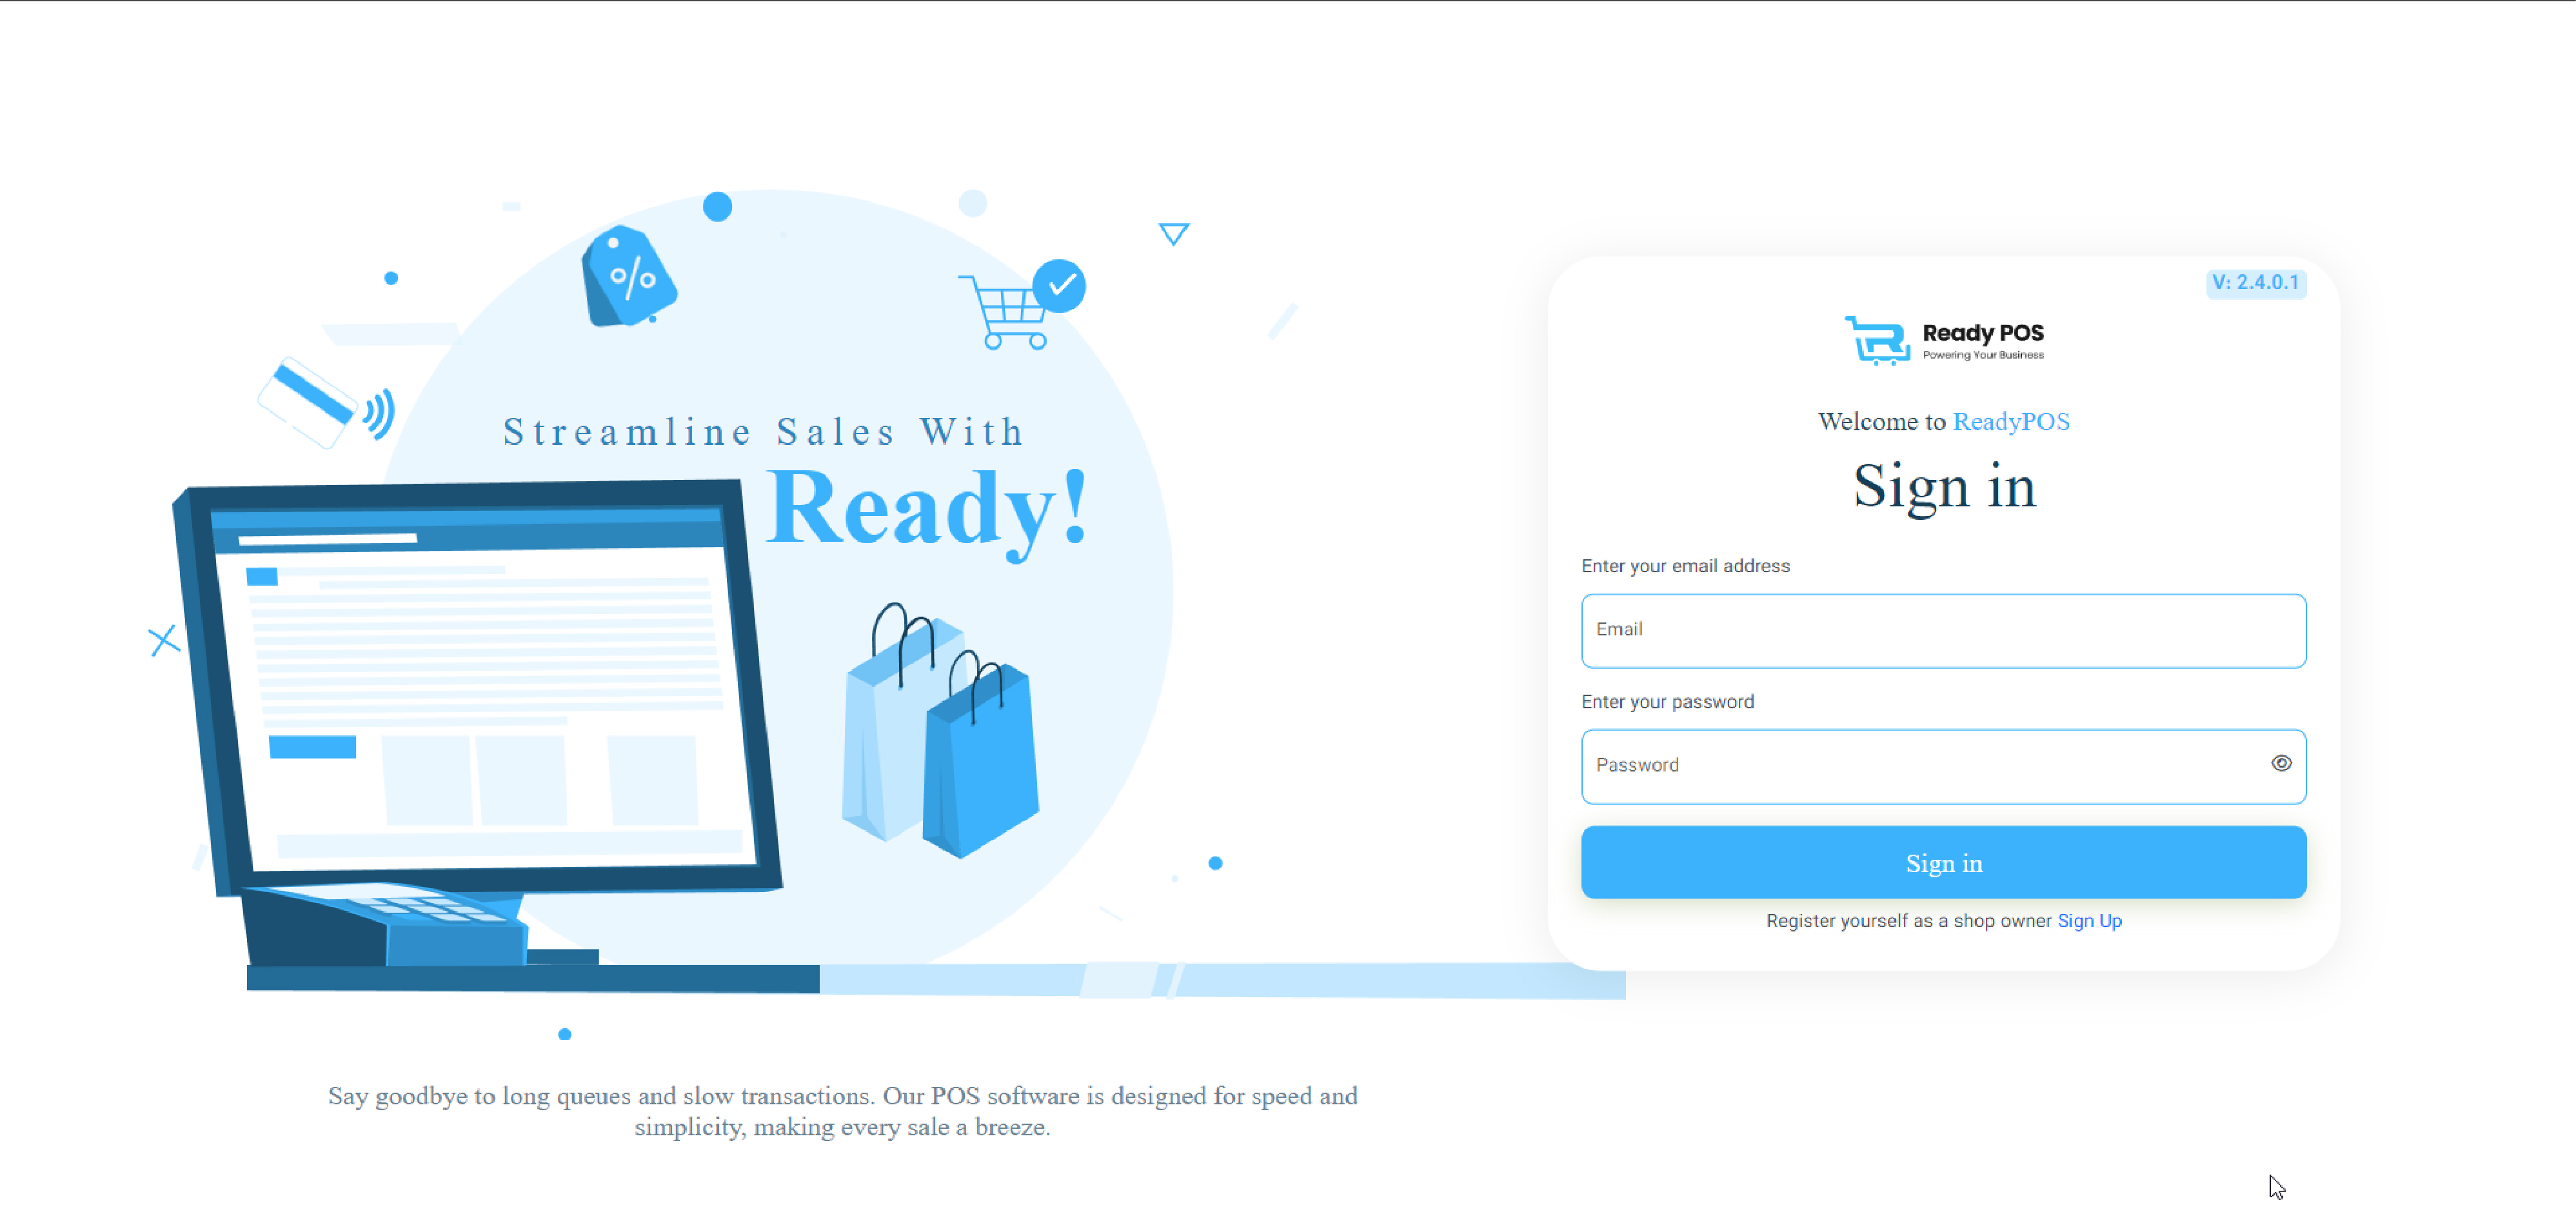
- You can then run your domain in any browser after that
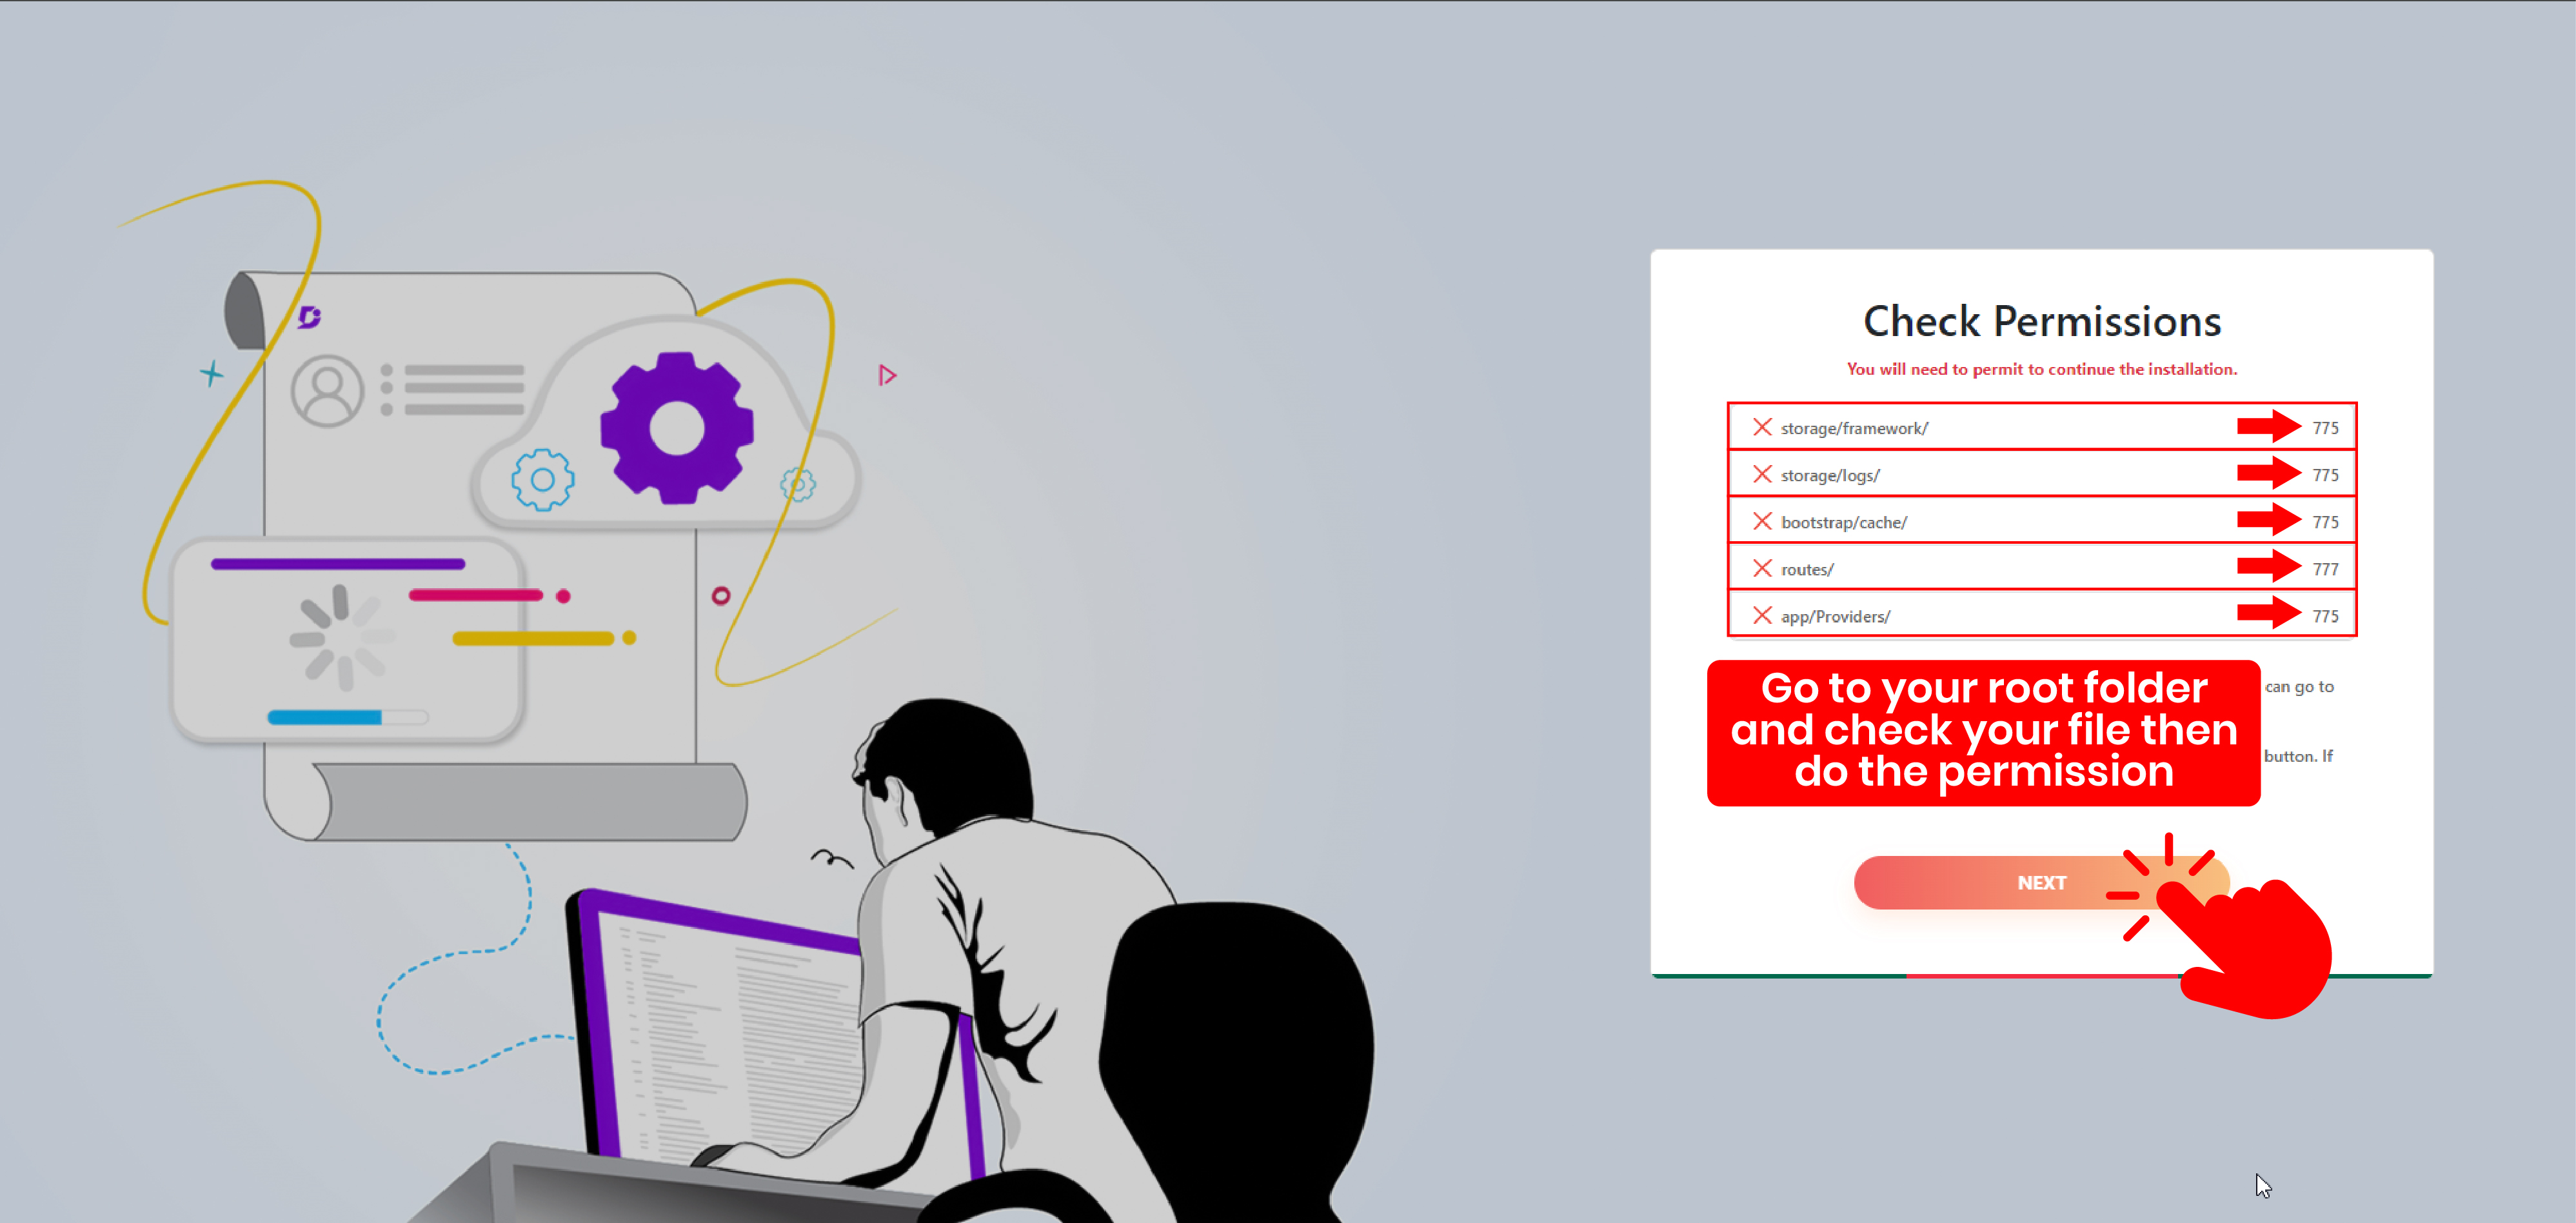
- Press the Start Installation Process button that appears on the screen
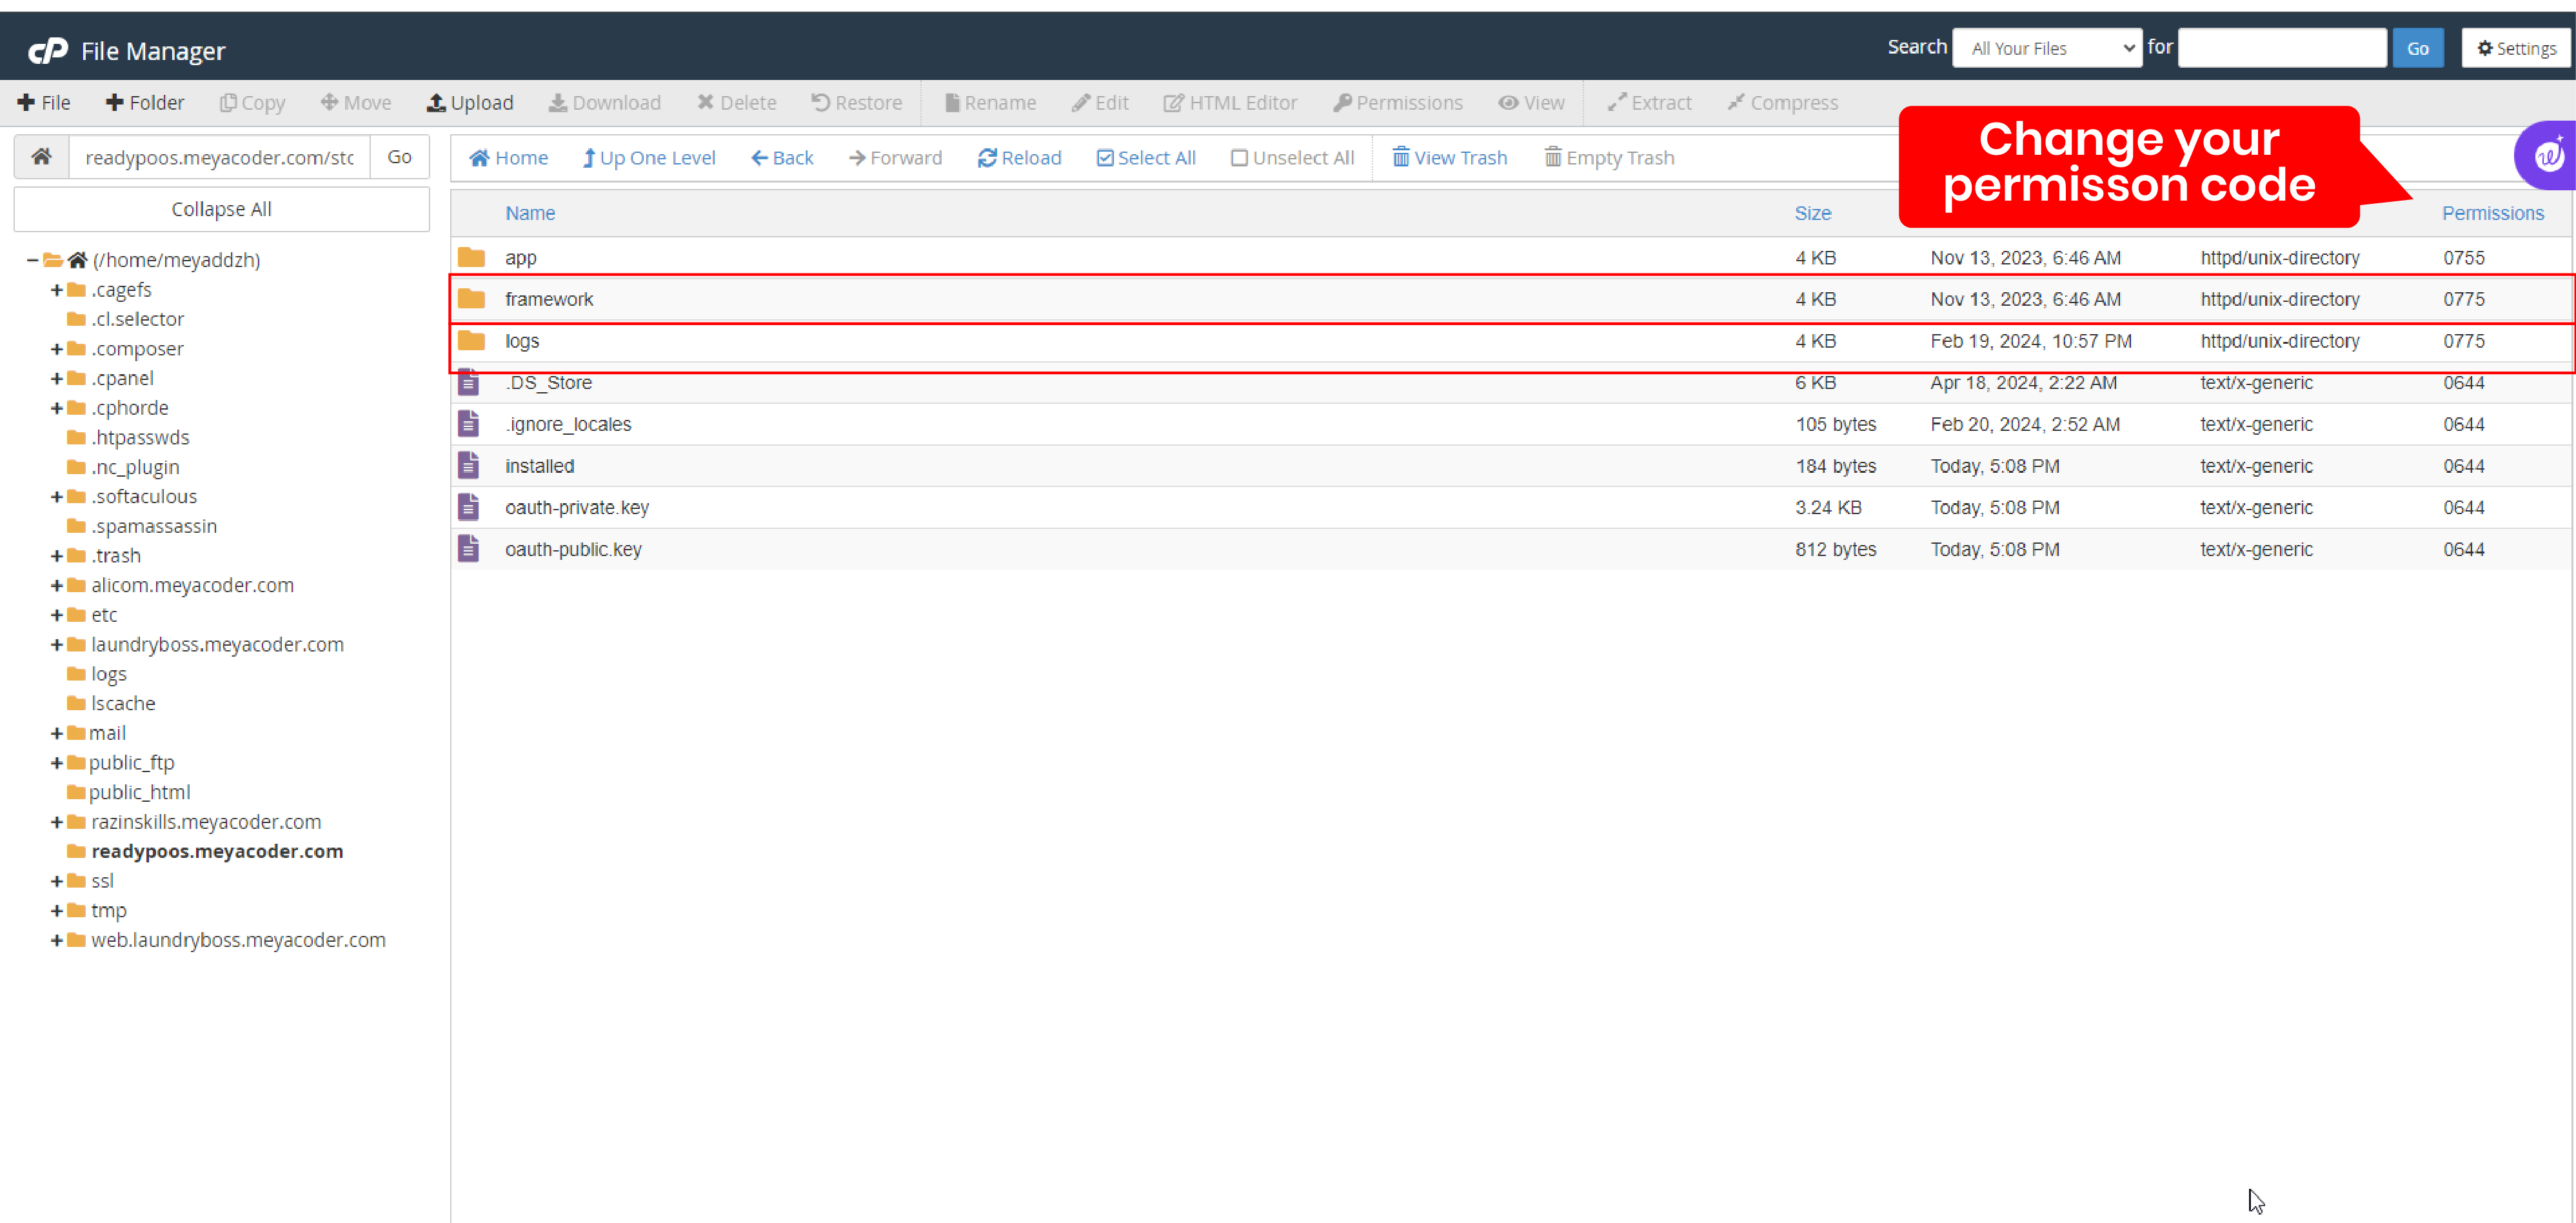
- Then go to the root folder to check permission and give permission to the mentioned folders
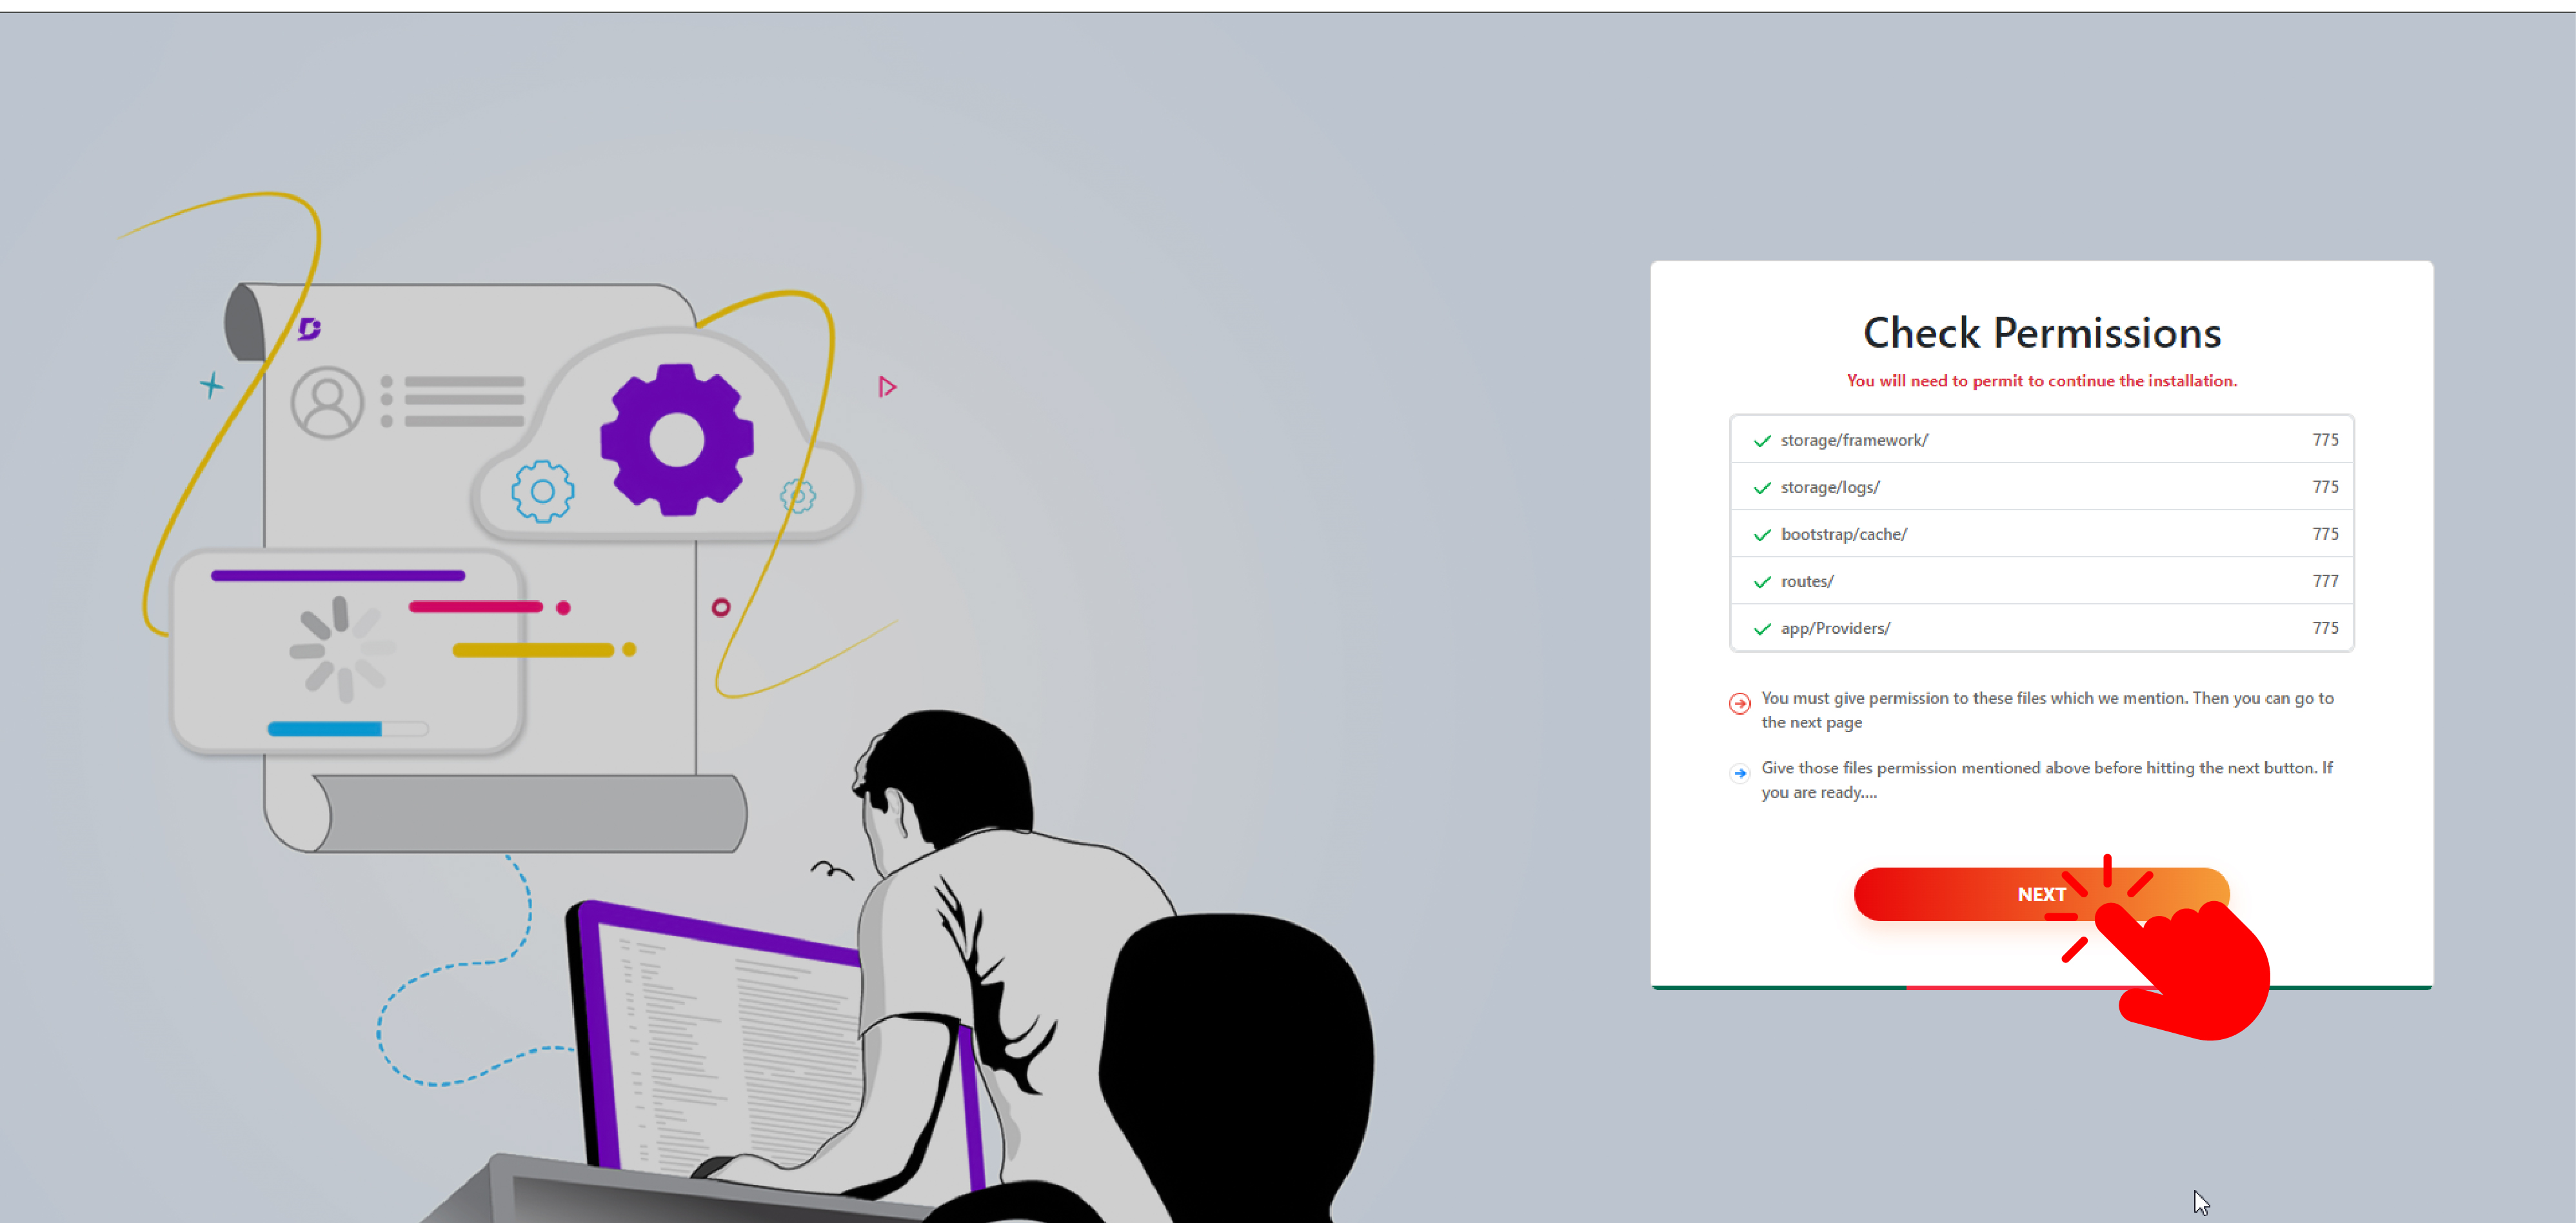
- After that, if the permissions of the files are all right, then press the Next button
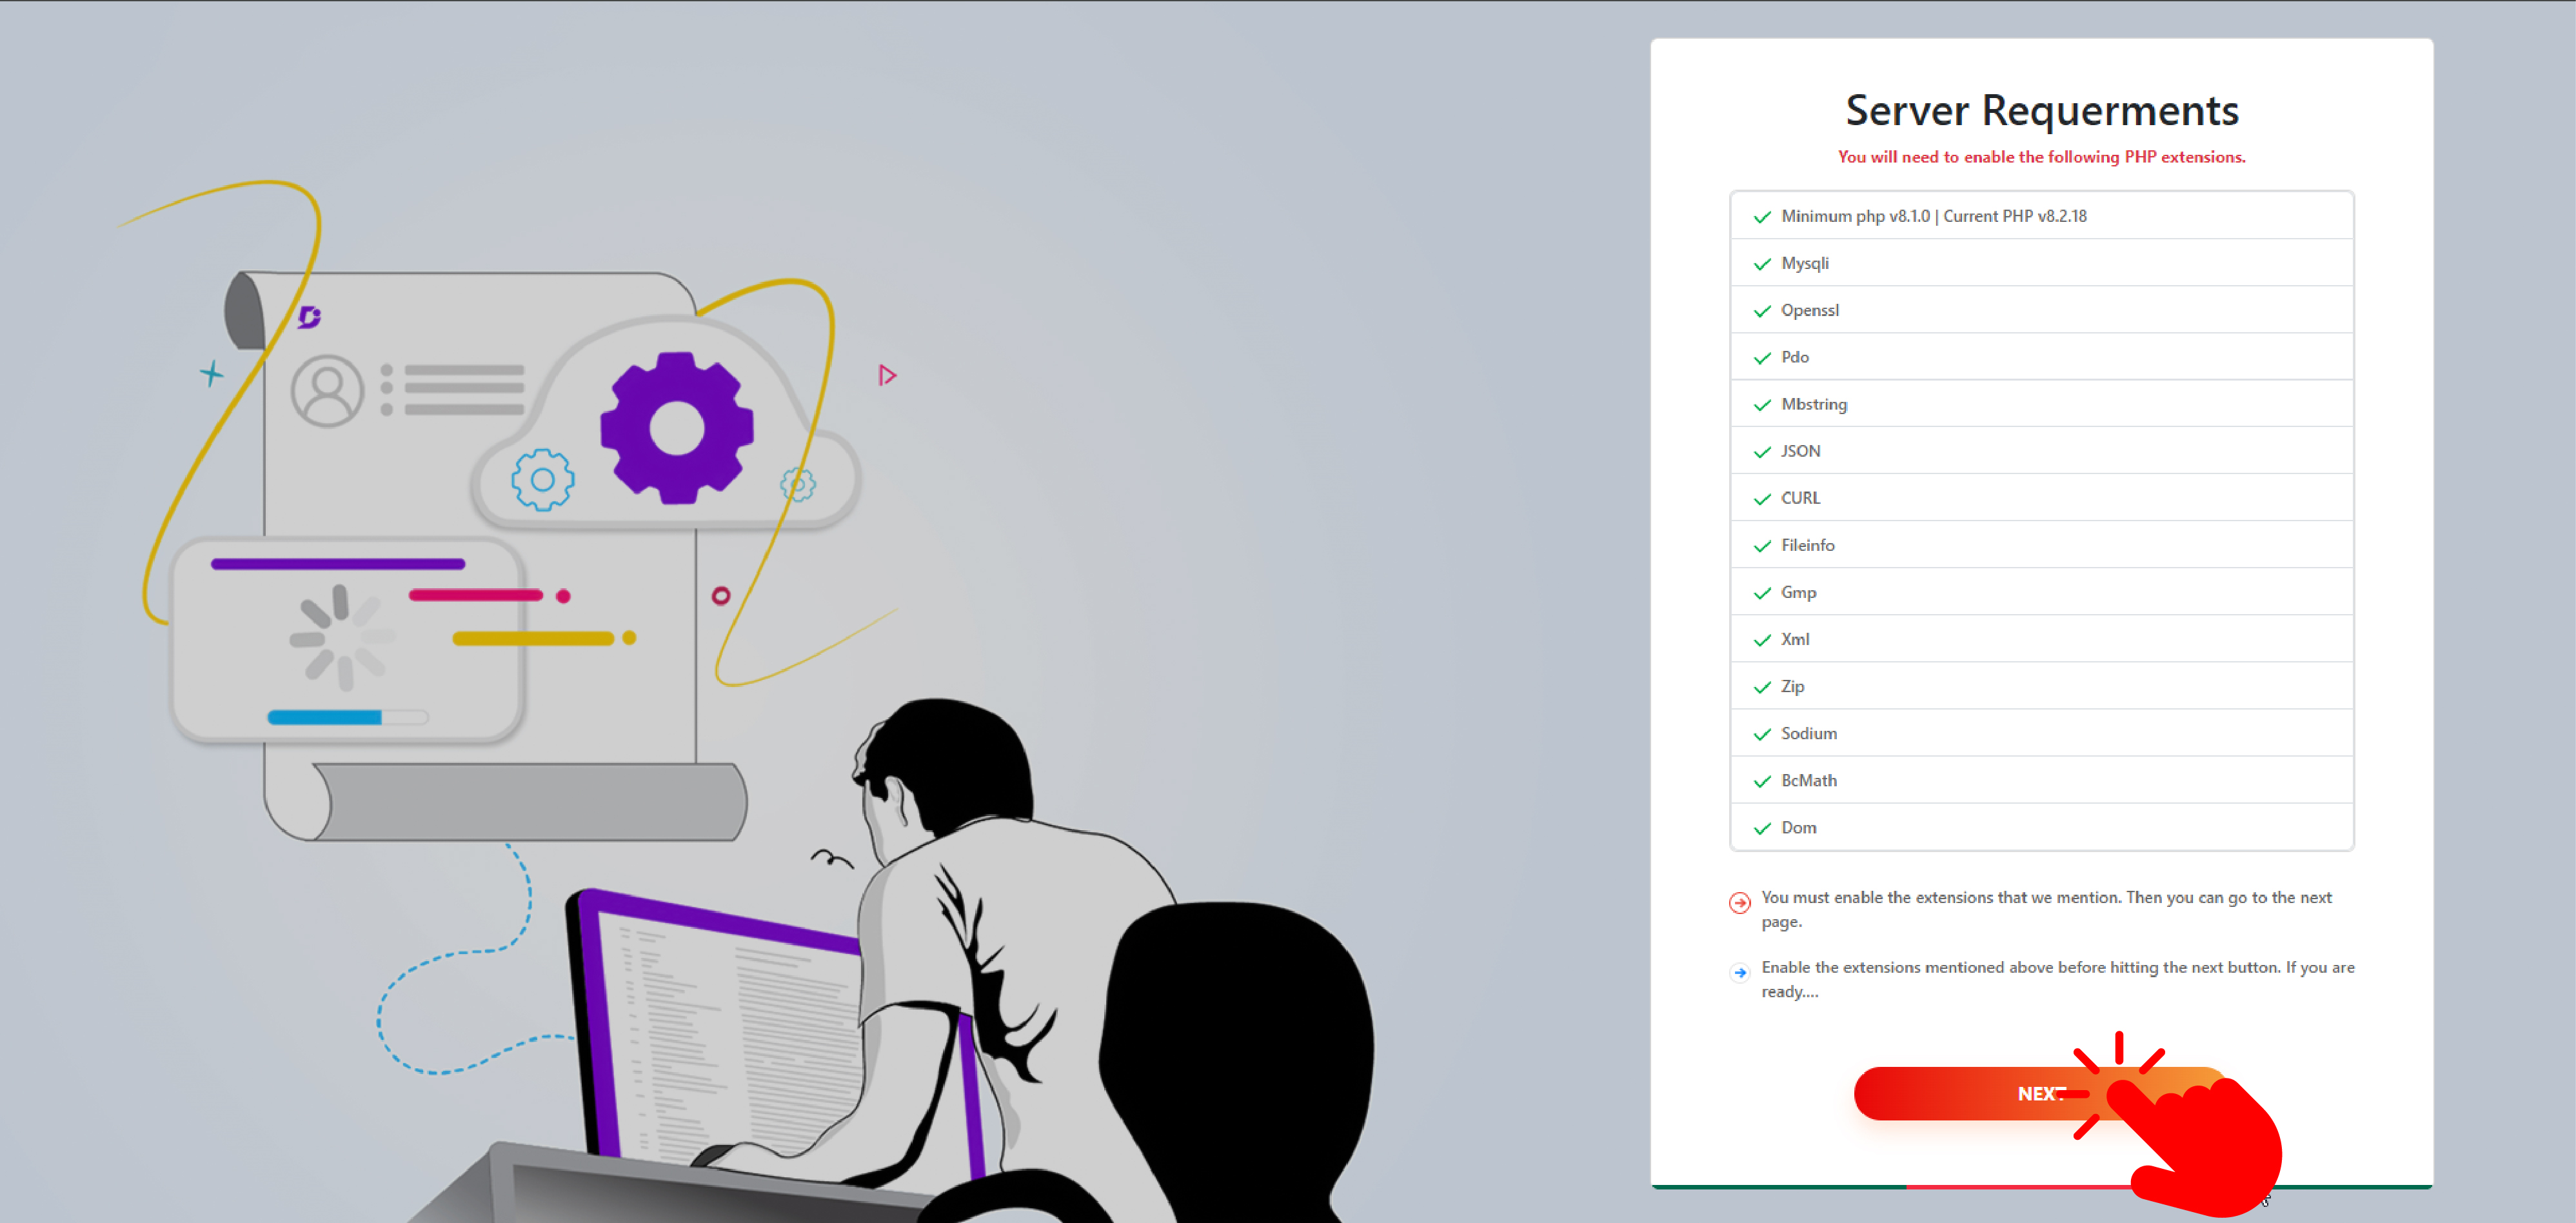
- After that, if the server request extensions are enabled, then click on the next button. If any extension is shown as disabled, then go to select PHP version from the C panel and enable all the extensions that are shown as disabled, then refresh the browser and then click on the next button.
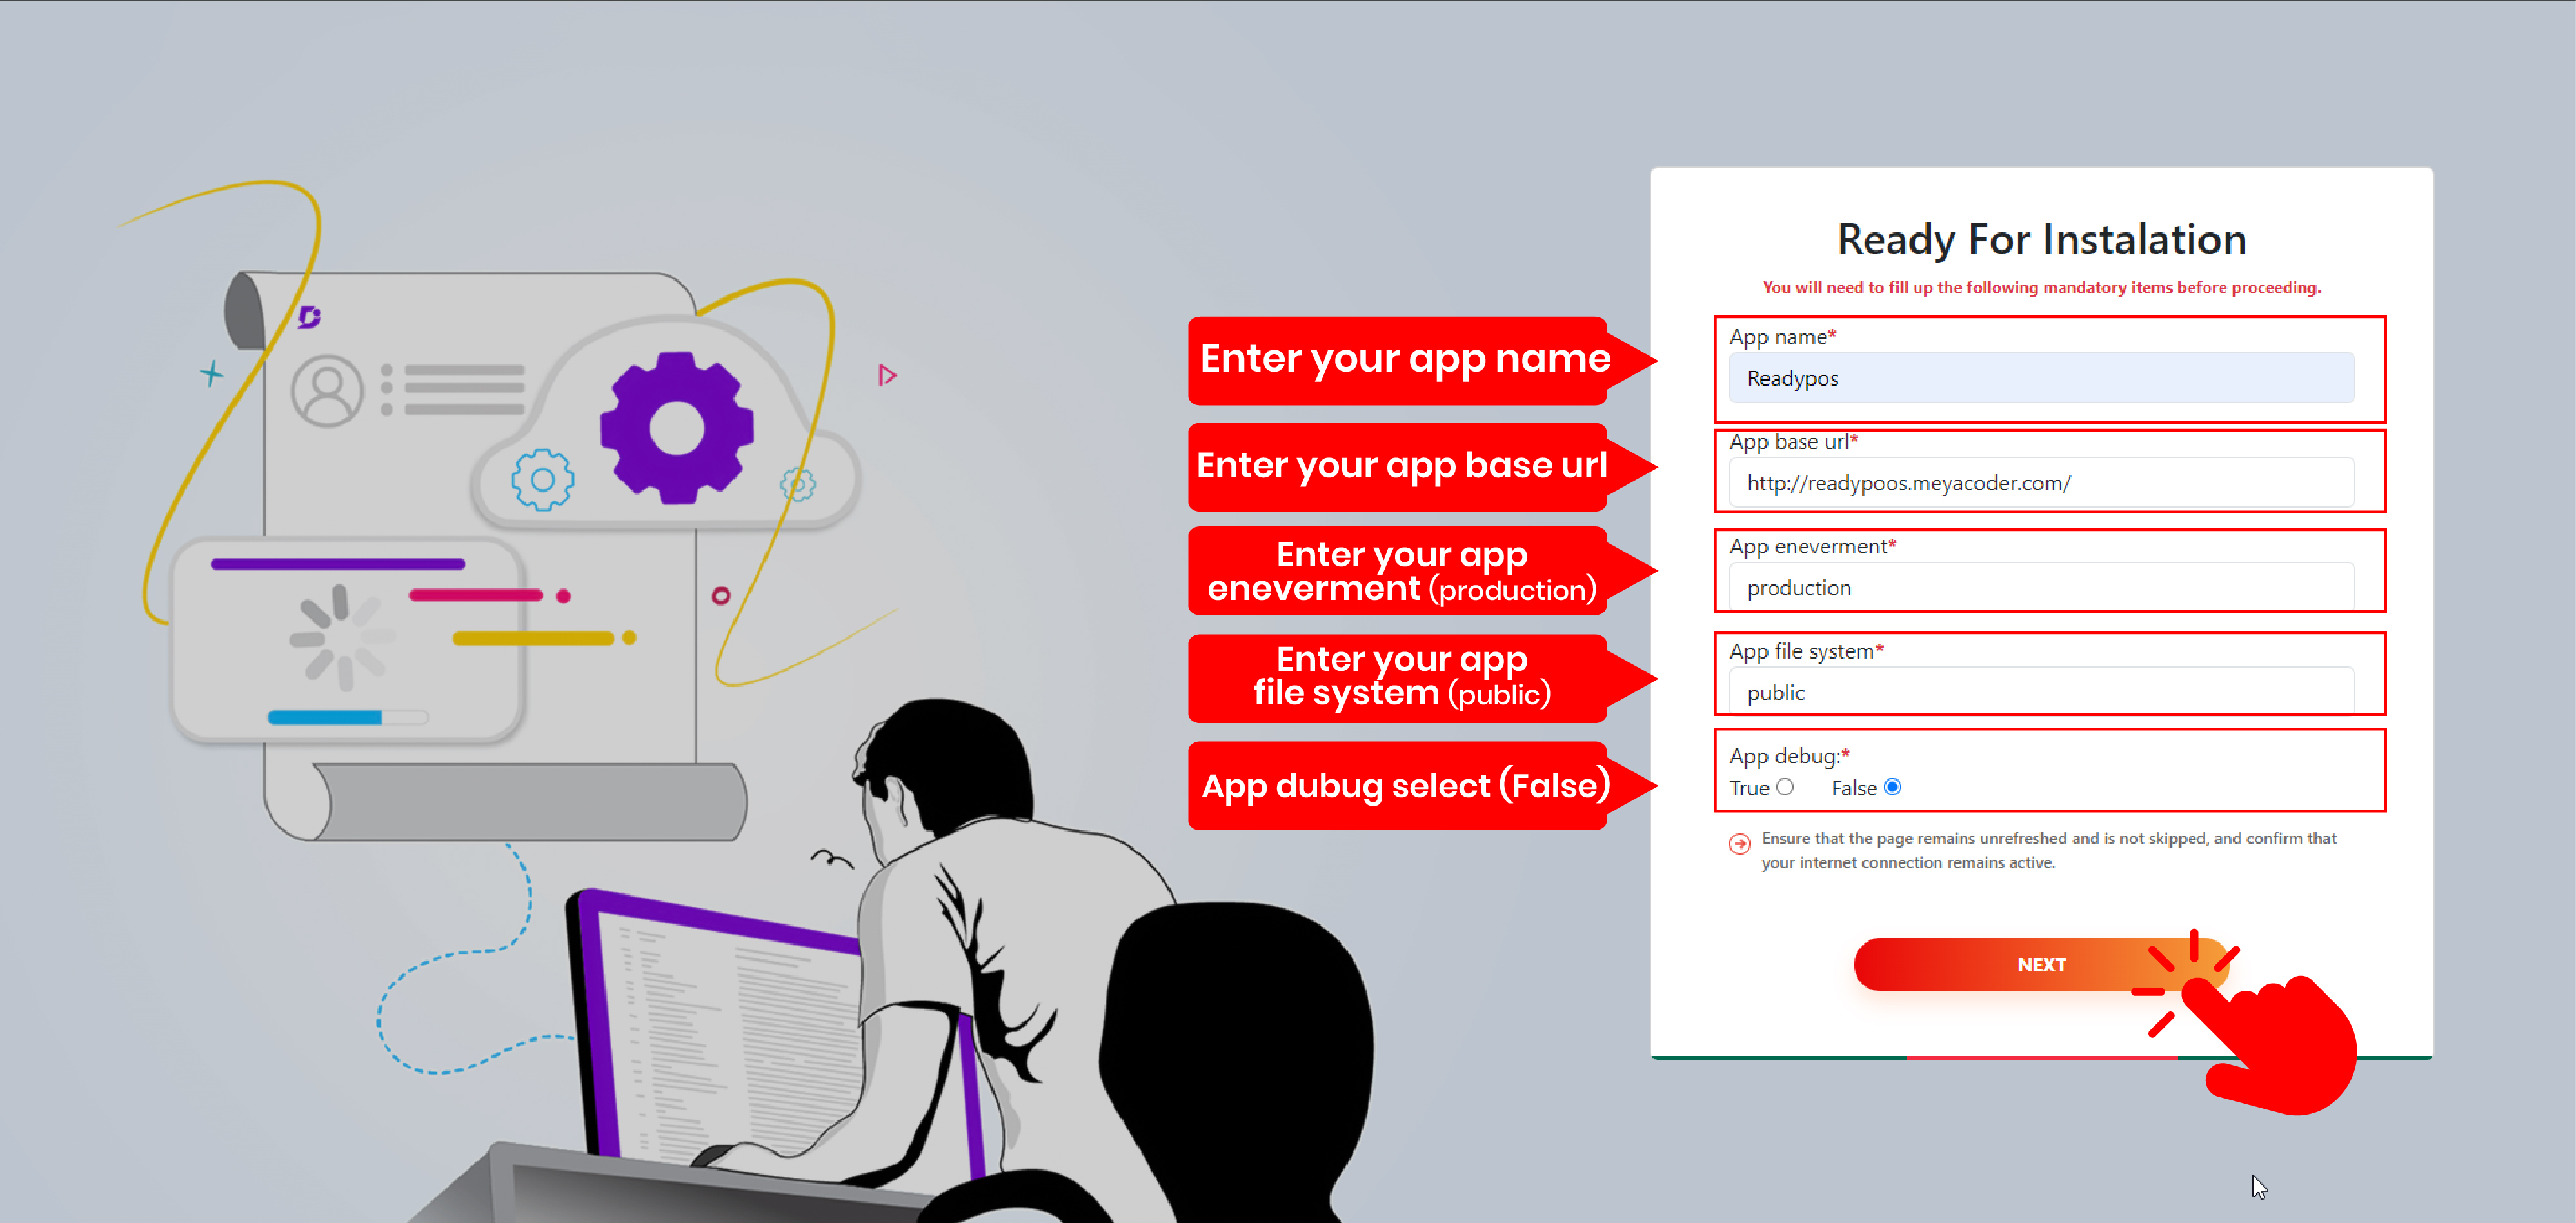
- Then fill up the written forms and press the next button
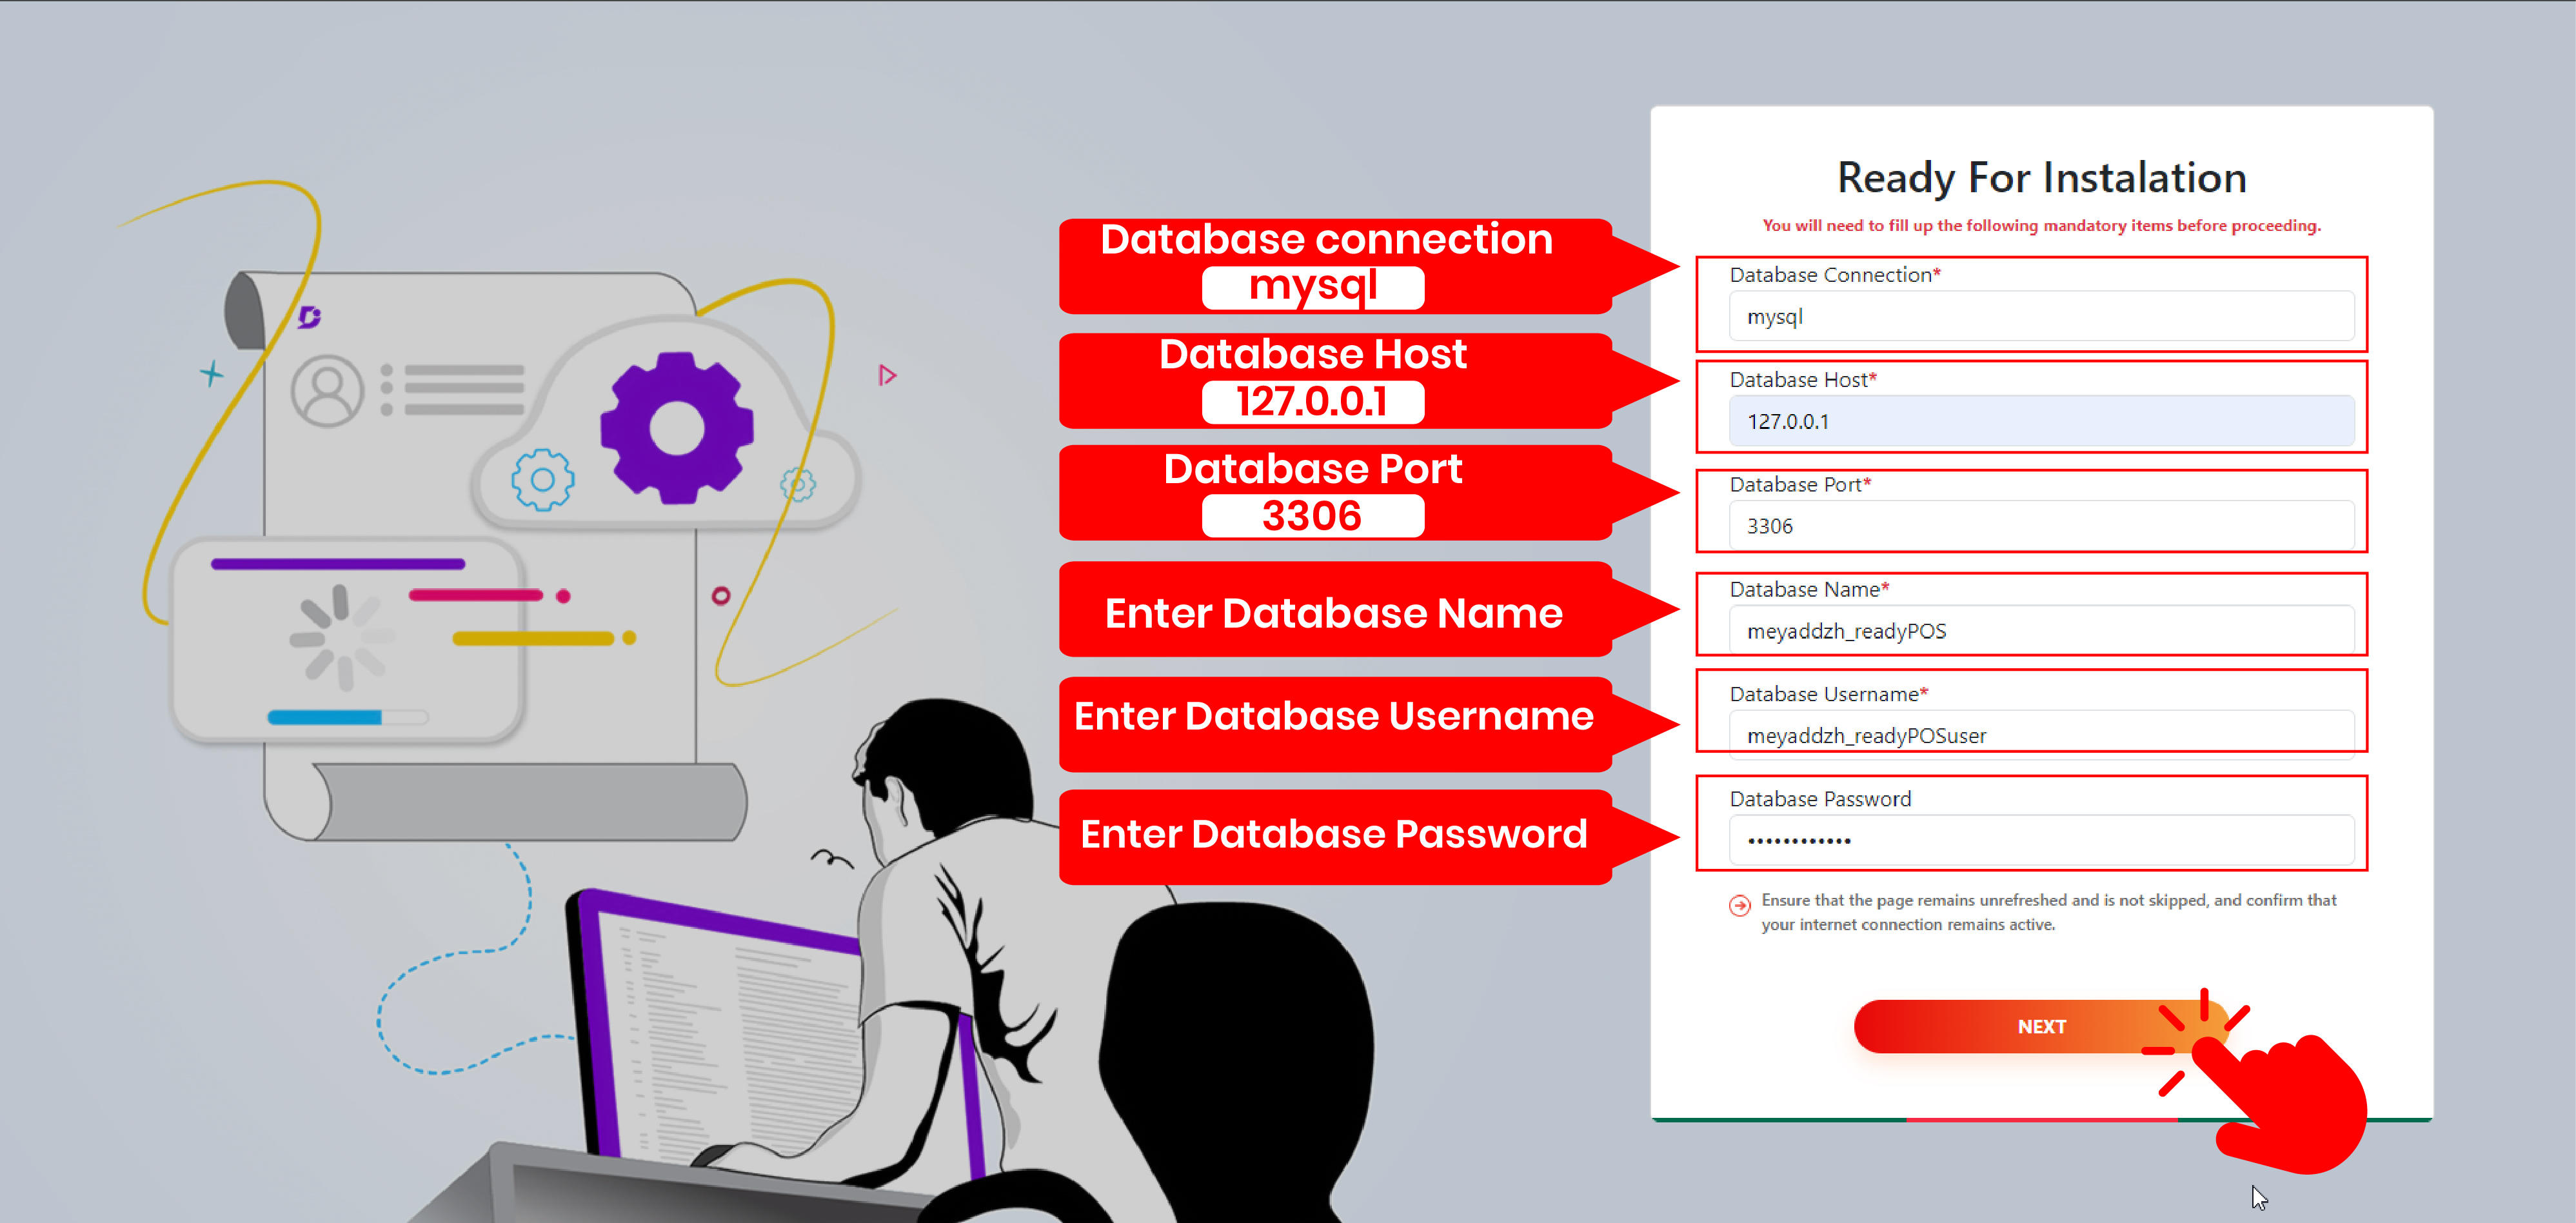
- Connect to the database you created and press the next button
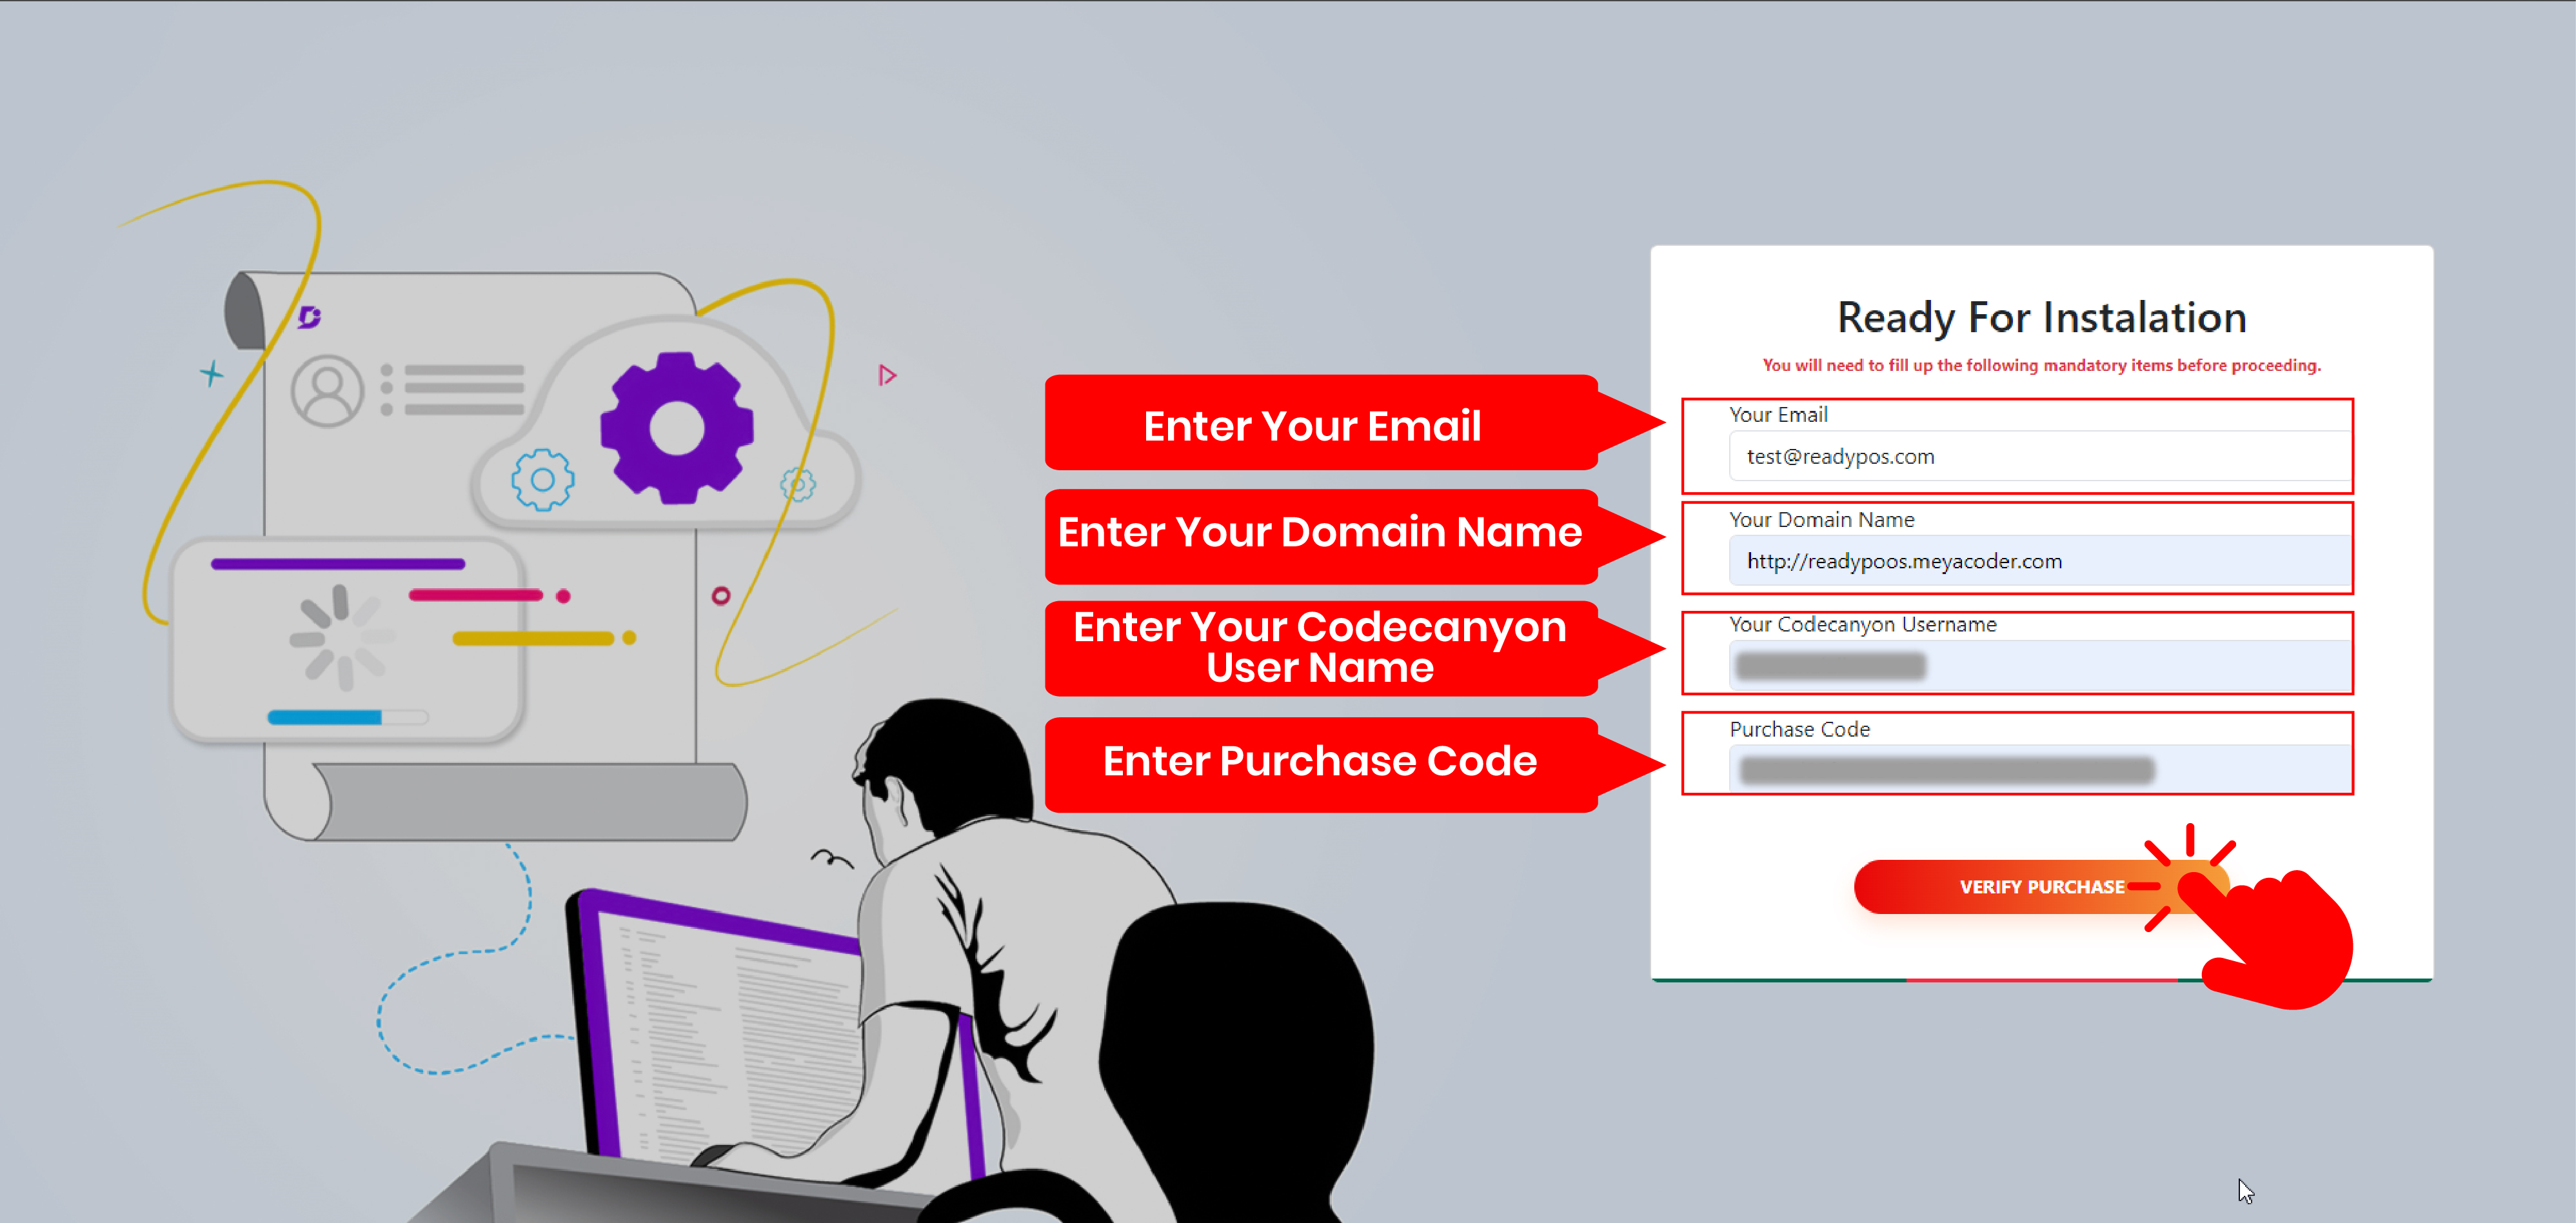
- Then fill out the form using your Email Account, Domain, Codecanyon Username, and your Purchase Code, and click the Verify Purchases button.
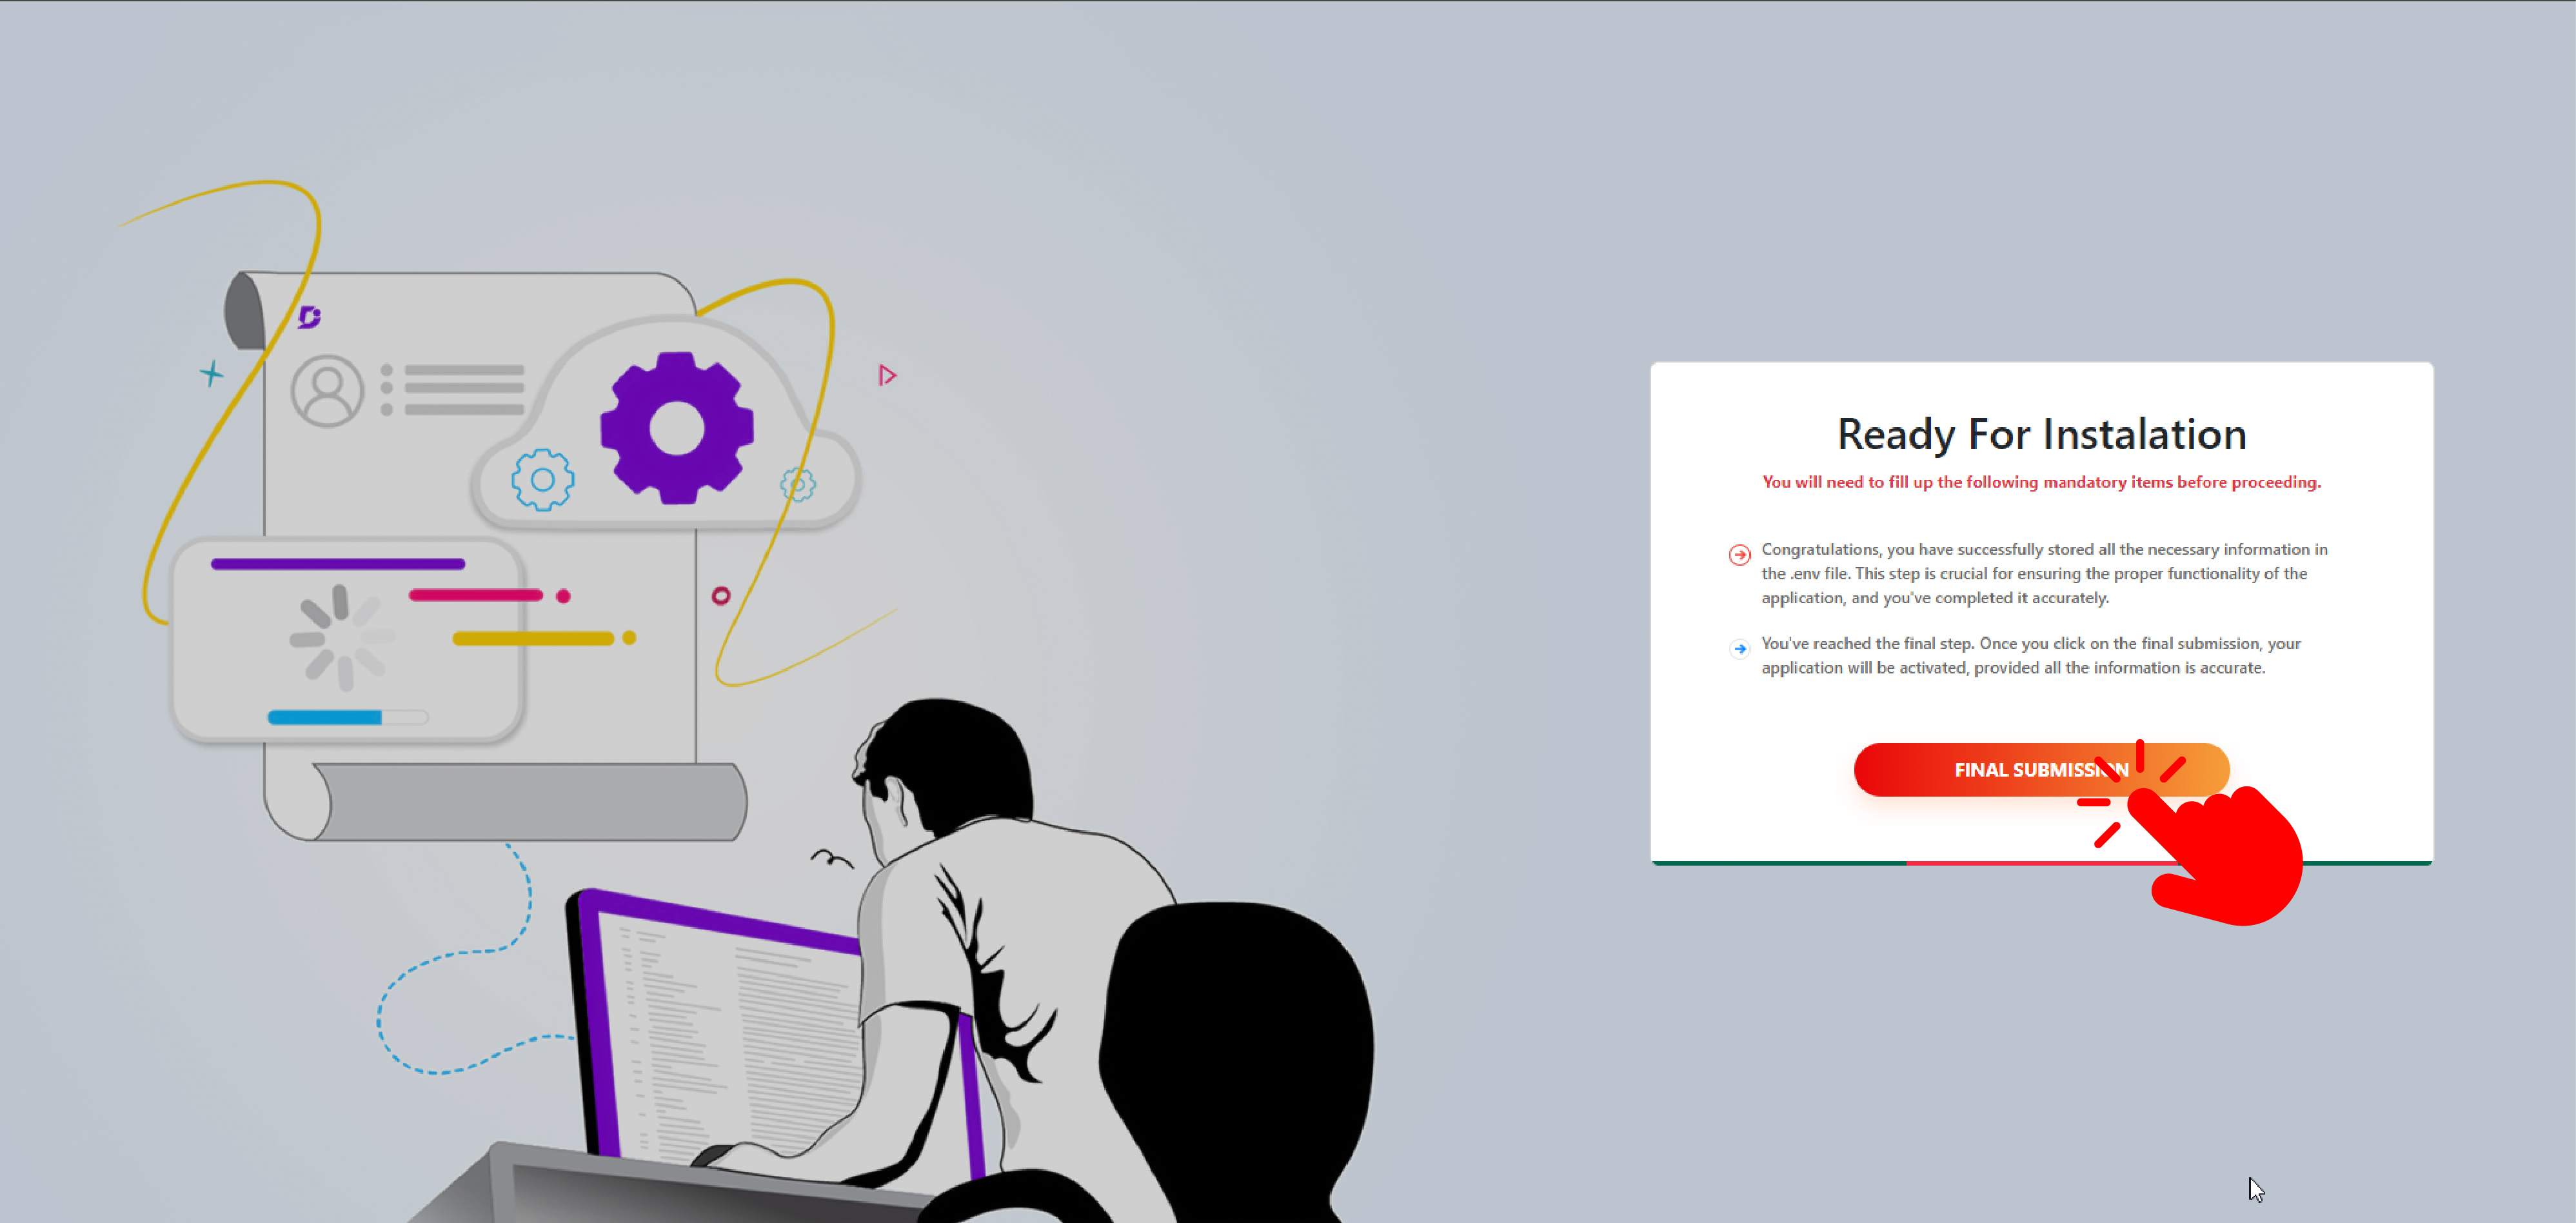
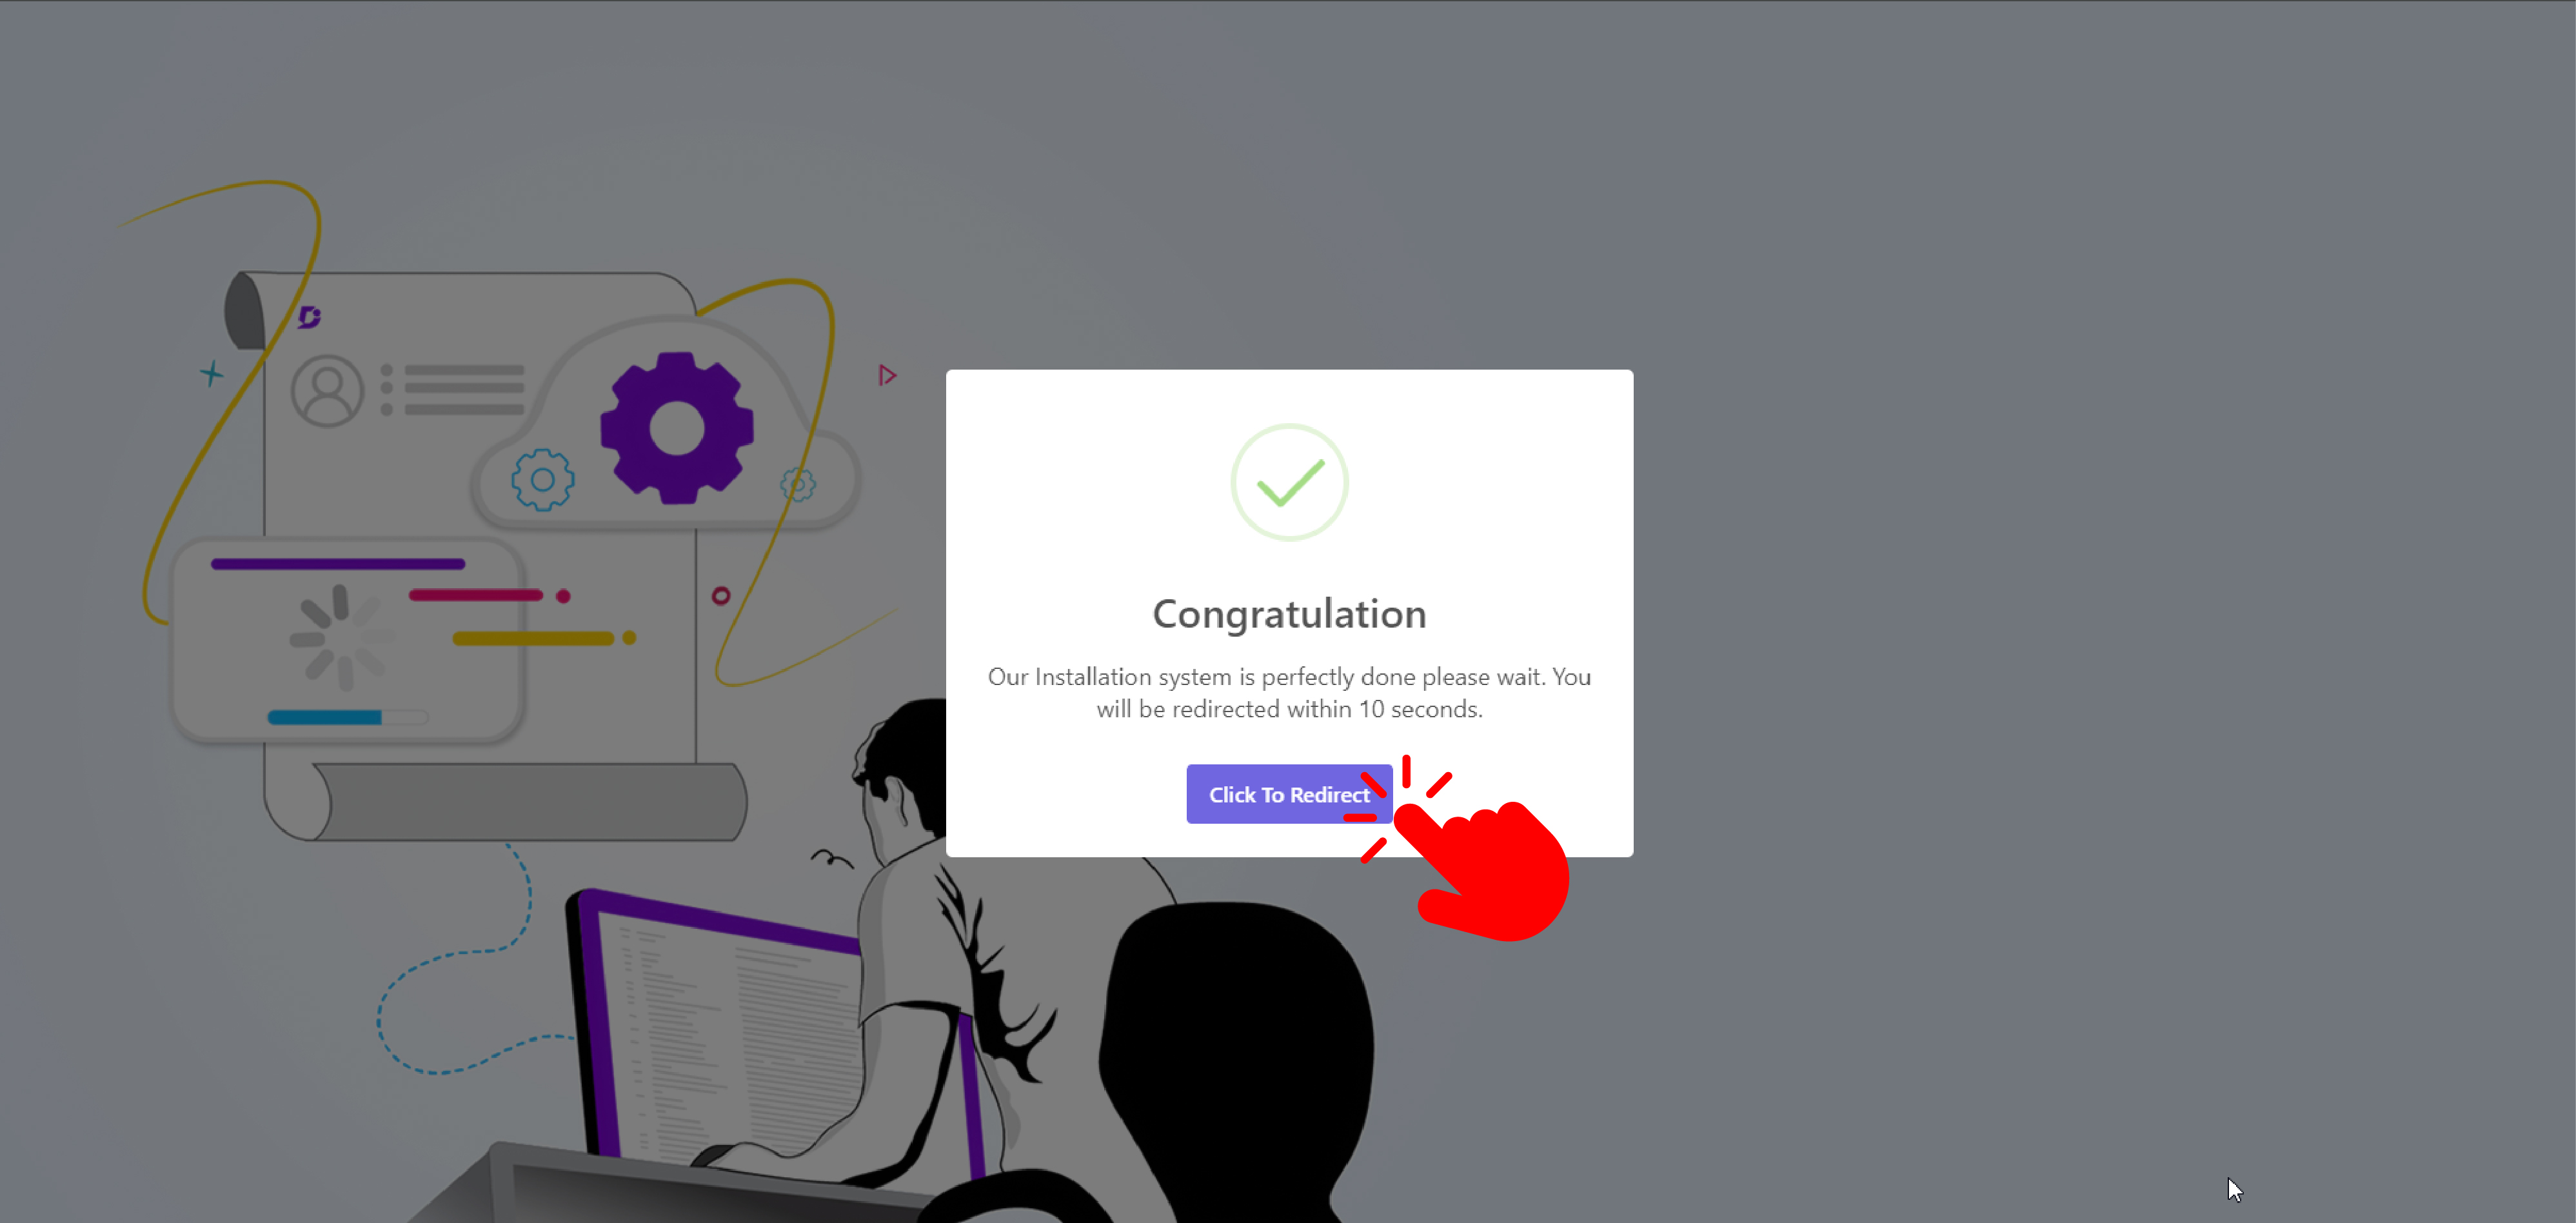
- Click on the Final Submission button and complete the installation process by clicking on the Click to Redirect button.
Example

Example
Example
Example
Full Installation Journey Example

- At first go to public directory laundry / public if exit is storage folder delete this.
- Then go to
route/web.phppaste this code. -
Route::get('/storagelink', function () { Artisan::call('storage:link'); }); - Go to your URL For Example:
http://razinsoft.com/storagelink